
Nutanix NCM-MCI Practice Exam Questions & Answers
Nutanix NCM-MCI Exam Details
Key details for this exam, checked against the published exam outline
- Exam Code
- NCM-MCI
- Full Name
- Nutanix Certified Master - Multicloud Infrastructure v6.10
- Issuing Body
- Nutanix
- Question Format (Our Bank)
- Multiple Choice
- Delivery
- Online proctored live laboratory environment with scenarios and tasks
- Eligibility
- Must hold any non-expired NCP or NCM-level certification
- Validity
- 2 years. renewal requires passing an equivalent NCM-level exam or renewing the same certification
- Full Question Set
- 33 questions Get All Questions
Free NCM-MCI Practice Questions
Each question shows the correct answer and an explanation of why it is right
Question 1 Domain 2 Optimize & Scale
SIMULATION
Task 10
An engineer is building a VM through Nutanix V3 API requests according to the following requirements.
* VM specifications:
* vCPUs: 2
* Memory: BGb
* Disk Size: 50Gb
* Cluster: Cluster A
* Network: default- net
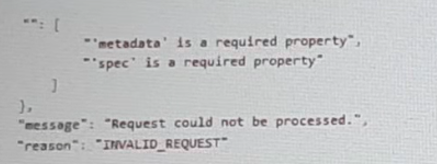
The API request is failing, which points to a problem in the payload:
The body is stored in Desktop/ Files/API_Create_VM,text
Fix any errors in the text file that would stop the VM from being created. Also make sure the VM will be created as speeded and save the corrected file for reuse under that same filename.
Deploy the VM through the API
Note: Do not power on the VM.
https://portal.nutanix.com/page/documents/kbs/details?targetId=kA00e000000LLEzCAO
https://jsonformatter.curiousconcept.com/#
acli net.list (uuid network defult_net)
ncli cluster info (uuid cluster)
Put Call: https://Prism Central IP address : 9440/api/nutanix/v3vms
Change these lines to correct the API call, without adding or duplicating any lines.
You may verify the call with the Prism Element API explorer or PostMan
Body:
{
{
'spec': {
'name': 'Test_Deploy',
'resources': {
'power_state':'OFF',
'num_vcpus_per_socket': ,
'num_sockets': 1,
'memory_size_mib': 8192,
'disk_list': [
{
'disk_size_mib': 51200,
'device_properties': {
'device_type':'DISK'
}
},
{
'device_properties': {
'device_type':'CDROM'
}
}
],
'nic_list':[
{
'nic_type': 'NORMAL_NIC',
'is_connected': true,
'ip_endpoint_list': [
{
'ip_type': 'DHCP'
}
],
'subnet_reference': {
'kind': 'subnet',
'name': 'default_net',
'uuid': '00000000-0000-0000-0000-000000000000'
}
}
],
},
'cluster_reference': {
'kind': 'cluster',
'name': 'NTNXDemo',
'uuid': '00000000-0000-0000-0000-000000000000'
}
},
'api_version': '3.1.0',
'metadata': {
'kind': 'vm'
}
}
https://www.nutanix.dev/2019/08/26/post-a-package-building-your-first-nutanix-rest-api-post-request/
Reference
Question 2 Domain 2 Optimize & Scale
SIMULATION
An Infrastructure as a Service provider must bring a new client on board. The client requires a dedicated cloud plan that stays operational through two host failures.
The client intends to migrate its existing workloads in three phases, spaced three months apart, with the first phase starting today:
Phase One: 100 VMs
Phase Two: 50 VMs
Phase Three: 20 VMs
Workload profile is:
vCPU: 4
vRAM: 16 GB
Storage: 200 GB
The service provider must forecast the required resources in advance so it can meet the client's requirements, while also taking into account that:
cap the total number of nodes
chosen system vendor HPE
chosen model DX365-10-G11-NVMe
all-flash node (including NVMe + SSD)
12 month runway
Build and store the scenario under the name IaaS, then export it to the desktop as IaaS-requirement.pdf
Important: The PDF must be exported to the desktop under the exact name IaaS-requirement.pdf, otherwise no credit will be awarded.
Below is the step-by-step procedure for building and exporting the capacity planning scenario. This task is carried out within Prism Central.
1. Open the Planning Dashboard
From the Prism Central main menu (hamburger icon), go to Operations > Planning.
2. Create and Define the Scenario
Click the + Create Scenario button.
In the dialog box:
Scenario Name: IaaS
Scenario Type: Select New Workload
Click Create to open the scenario editor.
3. Configure the Cluster and Runway Settings
In the 'IaaS' scenario editor, locate the Runway setting (top left) and set it to 12 Months.
Find the Cluster configuration tile and click Edit.
Set Number of Host Failures to Tolerate to 2.
Click Save.
4. Specify the Workload Profile
In the Workloads section, click the + Add Workload button.
Select Create a new workload profile.
Enter the VM specifications:
Workload Name: Customer-VM (or similar)
vCPU per VM: 4
Memory per VM: 16 GB
Storage per VM: 200 GB
Click Add.
5. Set the Workload Growth Plan (Waves)
You will return to the main scenario editor. In the timeline section ('Workload Plan'), add the VMs:
Wave One (Today):
Click + Add under the 'Today' column.
Select the Customer-VM profile.
Enter 100 VMs.
Click Add.
Wave Two (3 Months):
Click the + icon on the timeline itself.
Set the date to 3 Months from today.
Click + Add under this new '3 Months' column.
Select the Customer-VM profile.
Enter 50 VMs.
Click Add.
Wave Three (6 Months):
Click the + icon on the timeline.
Set the date to 6 Months from today.
Click + Add under this new '6 Months' column.
Select the Customer-VM profile.
Enter 20 VMs.
Click Add.
6. Choose the Hardware
In the Hardware configuration tile, click Change Hardware.
In the 'Select Hardware' pane:
Model: Search for and select DX365-10-G11-NVMe.
Note: This model is full-flash by definition, which meets the requirement.
Click Done. The planner will recalculate the required nodes.
7. Save and Export the Scenario
Click the Save icon (floppy disk) in the top-right corner to save the IaaS scenario.
Click the Export icon (arrow pointing down) in the top-right corner.
Select PDF from the dropdown menu.
A 'Save As' dialog will appear.
Navigate to the Desktop.
Set the file name to IaaS-requirement.pdf.
Click Save.
Question 3 Domain 4 Design Implementation
SIMULATION
Task 7
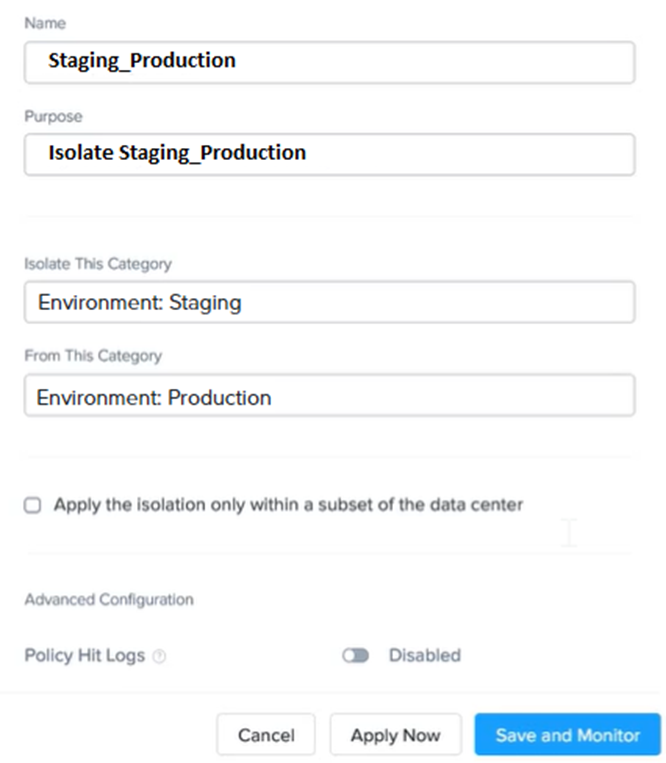
An administrator has an environment that will be upgraded to 6.5 soon. Until then, they must enable logging and apply a security policy called Staging_Production, which ensures that no VM in the Staging Environment is able to communicate with any VM in the production Environment.
Set up the environment so that this requirement is met.
Note: Every setting that is not mentioned must remain at its default value.
To set up the environment so that no VM in the Staging Environment can communicate with any VM in the production Environment, complete the following steps:
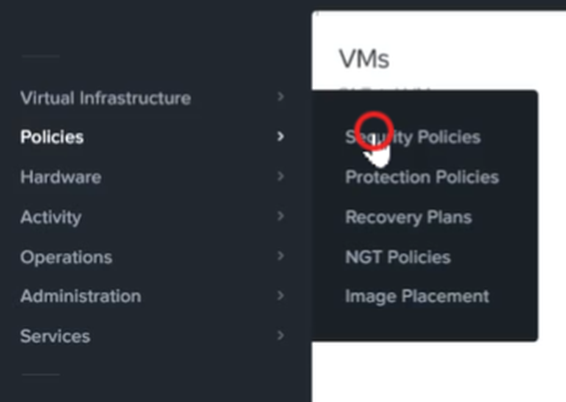
Sign in to Prism Central, then navigate to Network > Security Policies > Create Security Policy. Type Staging_Production as the policy name and choose Cluster A as the cluster.
In the Scope section, set the entity type to VMs and add the VMs belonging to the Staging Environment and the Production Environment as entities. Tags or categories can be used to filter the VMs by environment.
In the Rules section, add a new rule with these settings:
Direction: Bidirectional
Protocol: Any
Source: Staging Environment
Destination: Production Environment
Action: Deny
Save the policy and apply it to the cluster.
This produces a policy that blocks traffic between VMs in the Staging Environment and VMs in the Production Environment. To test it, attempt to ping or connect to a VM in the Production Environment from a VM in the Staging Environment, and the reverse. Both attempts should fail.

Get the complete NCM-MCI question set
$20$40
Question 4 Domain 2 Optimize & Scale
SIMULATION
The database administration group has requested a new SQL database instance and wants it configured for optimal performance. This virtual machine was moved over from a three-tier architecture into Nutanix.
The database VM runs 4 databases, each capped at 20 GB. Log files are not expected to grow beyond 20 GB and must be kept within 25% to prevent runaway processes. Do not provision more storage than is required.
The migrated virtual machine is named sql3532. After it has been correctly reconfigured, the DBA team will handle the OS and database configuration.
The VM must follow the guidance in KB-3532.
During testing, this VM must be set to power on first if the node hosting it fails.
For the best performance, keep as much of the VM as possible on SSD storage.
Note: The VM does not have to be powered on. It must remain on the default container and must not be attached to a volume group. Networking is not needed at this time.
Below is the step-by-step procedure for reconfiguring the sql3532 virtual machine.
This procedure is carried out in Prism Element for the cluster that hosts the VM (for example, Cluster 1).
1. Locate and Update the VM
From the Prism Element dashboard, open the VM view.
Locate the VM named sql3532 in the VM table.
Tick the checkbox beside sql3532 and select the Update button.
2. Configure HA Priority and Flash Mode
In the 'Update VM' dialog, set the HA and SSD performance options:
HA Priority:
Go to the VM High Availability section.
Choose the High Priority radio button. This makes the VM one of the first to power on during an HA event.
Flash Mode (SSD Performance):
Scroll to the Flash Mode section.
Tick the Enable Flash Mode box. This pins the VM's vDisks to the SSD tier, meeting the requirement to keep as much of the VM as possible on SSDs, particularly because it sits on the default (hybrid) container.
3. Reconfigure Disks (per KB-3532)
While still in the 'Update VM' dialog, scroll to the Disks section to add the new data and log disks. The main factor for 'best performance' (KB-3532) is placing Data and Logs on separate vSCSI controllers.
(The VM already has an OS disk, which we will assume is on scsi.0.)
Add Data Disk:
Select the + Add New Disk button.
Storage Container: default (as required).
Size: 80 GB (for the 4 x 20 GB databases).
Bus Type: SCSI.
Device Index: 1. (This creates a new vSCSI controller, scsi.1, for the data disk).
Click Add.
Add Log Disk:
Select the + Add New Disk button.
Storage Container: default (as required).
Size: 20 GB.
Bus Type: SCSI.
Device Index: 2. (This creates a third vSCSI controller, scsi.2, for the log disk).
Click Add.
4. Save Configuration
After the disks are added and HA and Flash Mode are set, click the main Save button at the bottom of the 'Update VM' dialog.
The VM now has high availability, its storage is pinned to SSD, and its disk layout follows performance best practices by placing the OS, Data, and Log I/O paths on three separate controllers.
Topic 2, Performance Based Questions Set 2
Lab Environment
A dedicated lab environment has been prepared for your assessment and contains the following:
Workstation
* windows Server 2019
* All required software and tools for the tasks
* Nutanix documentation and whitepapers are located in desktop\files\Documentation
* The workstation is the system you are currently logged into
Nutanix Cluster
* Three clusters are available. Connection details for the applicable cluster appear at the top of each question. Confirm you are using the correct cluster for every item. Disregard any licensing violations.
* Cluster A is a 3-node cluster running Prism Central 2022.6, where the majority of questions are completed
* Cluster B is a one-node cluster that includes one syslog task and one security task.
* Cluster D is a one-node cluster running Prism Central 5.17 and includes one security policy task.
Important Notes
* If text is too small to read or part of the GUI is hidden, adjust the browser zoom with CTRL + ,and CTRL + (the plus and minus keys)
You have 3 hours to finish the scenarios for Nutanix NCMMCI
After you select the start button below, you will receive:
- A Windows desktop and a browser page containing the scenarios and credentials (Desktop\instructions)
Notes for this exam session:
The browser window can be scaled to improve visibility and fit all content on screen.
- Keyboard copy and paste shortcuts do not work. Use the mouse to copy and paste.
- The Notes and Feedback tabs for each scenario are for recording personal notes or leaving feedback for
- Confirm that you are working on the correct components.
- Modifying security or network settings on the wrong component could lower your grade.
- Do not modify credentials on any component unless instructed to do so.
- All required documentation is stored in the Desktop\Files\Documentation directory
Question 5 Domain 2 Optimize & Scale
SIMULATION
A systems administrator is attempting to build a virtual machine by sending Nutanix V3 API requests, using the specifications below.
VM specifications:
vCPUs: 2
Memory: 8Gb
Disk Size: 50Gb
Cluster: Cluster 1
Network: default-net
Branding must be disabled on the VM
The API request fails and reports a payload problem:
"": [
"'metadata' is a required property",
"'spec' is a required property"
],
"message": "Request could not be processed.",
"reason": "INVALID_REQUEST"
The request body is stored on the desktop as desktop\API_Create_VM.txt.
Fix any problems in the text file that would stop the VM from being created. Additionally, confirm the VM will be built exactly as specified, and save the corrected file under that same filename so it can be reused.
Create the VM through the API.
Note: Do not power on the VM.
Below is the step-by-step walkthrough for correcting the API payload and creating the VM.
This task is carried out using the REST API Explorer within Prism Central.
1. Get Required UUIDs
Creating a VM requires the unique IDs (UUIDs) of the target cluster and network, so you need to collect those first.
From the Prism Central dashboard, click the question mark (?) icon in the top-right corner and select REST API Explorer.
Find Cluster 1 UUID:
In the API Explorer, locate and choose the clusters/list (POST) endpoint.
In the Body field, paste a simple filter: { 'kind': 'cluster' }
Click Send.
In the 'Response' body, locate the entry for Cluster 1 and copy its metadata.uuid value.
Find default-net UUID:
Locate and choose the subnets/list (POST) endpoint.
In the Body field, paste: { 'kind': 'subnet' }
Click Send.
In the 'Response' body, find the entry where spec.name is default-net and copy its metadata.uuid value.
2. Correct the API Payload File
The errors ''metadata' is a required property' and ''spec' is a required property' show that the JSON in the file is malformed and lacks the required root-level objects. The file contents also fail to match the VM specifications.
On the desktop, open API_Create_VM.txt in Notepad.
Remove all existing text from the file (including the POST Call and Body: lines).
Paste the following corrected and complete JSON payload into the file.
Replace <UUID_for_Cluster_1> and <UUID_for_default-net> with the actual UUIDs you copied in the previous step.
JSON
{
'spec': {
'name': 'API_VM_Task15',
'resources': {
'power_state': 'OFF',
'num_sockets': 2,
'num_vcpus_per_socket': 1,
'memory_size_mib': 8192,
'disk_list': [
{
'disk_size_mib': 51200,
'device_properties': {
'device_type': 'DISK'
}
}
],
'nic_list': [
{
'subnet_reference': {
'kind': 'subnet',
'uuid': '<UUID_for_default-net>'
}
}
],
'guest_customization': {
'is_overridable': true,
'override_branding': true
}
},
'cluster_reference': {
'kind': 'cluster',
'uuid': '<UUID_for_Cluster_1>'
}
},
'metadata': {
'kind': 'vm'
}
}
Save and close the API_Create_VM.txt file.
Correction Summary:
JSON Structure: The original file was malformed. The new payload supplies the required spec and metadata objects at the root level.
vCPUs: Set to 2 sockets (2 vCPUs total).
Memory: Set to 8192 MiB (8 GB).
Disk: Set to 51200 MiB (50 GB) and removed the unneeded CDROM.
Cluster/Network: Placeholders are added for the required UUIDs.
Branding: guest_customization.override_branding: true is added to disable branding for the VM.
3. Deploy the VM via API
Go back to the REST API Explorer.
Locate and choose the vms (POST) endpoint (the one with the description 'Create a new vm').
Open the corrected API_Create_VM.txt file and copy its entire contents (which now includes your specific UUIDs).
Paste the complete JSON payload into the Body field of the vms (POST) endpoint.
Click Send.
The API will return a 202 Accepted response, and the VM will be created (and remain powered off) on Cluster 1.
Question 6 Domain 3 Security
SIMULATION
An engineer must set up a new write-intensive MS-SQL virtual machine on Cluster 1.
Specifications for the VM:
vCPU: 12
vRAM: 128GB
Storage: 100 GB OS, 750 GB Data
Build the VM along with any objects it depends on in the current environment so the requirements are met and performance in the production environment is as high as possible. Add NEWSQL to the name of every new object.
Production environment details:
4 nodes
Each node contains two 8-core CPUs
Each node has 1024 GB RAM
Storage: 4 7.16 TB SSD Disks and 8 8 TB HDD disks
Confirm that the VM is configured for peak performance in the production environment.
Note: Configuring networking is not necessary at this stage. Do not power on the VM.
Below is the step-by-step procedure for building the high-performance SQL VM on Cluster 1.
The task involves two stages: first, creating a new all-flash storage container, and second, creating the VM with a specific vNUMA and disk controller layout for peak performance.
1. Access Cluster 1 Prism Element
From the main Prism Central dashboard, go to Hardware > Clusters.
Locate Cluster 1 in the list and click its name. This opens the Prism Element login page for that specific cluster.
Sign in to the Prism Element interface for Cluster 1.
2. Create the All-Flash Storage Container
To get the best performance for a 'write-intensive' workload on a hybrid cluster, the data and log disks need to reside on an all-flash container.
In the Cluster 1 PE interface, click the gear icon (Settings) in the upper-right corner.
In the left-hand menu, choose Storage.
Click the + Storage Container button.
Enter the basic details:
Name: NEWSQL_Flash_Container
Click Advanced Settings.
Scroll down to the Storage Tier section.
Select the SSD radio button. This forces all data in this container onto the SSD tier, which delivers all-flash performance.
Click Save.
3. Create and Configure the VM
Next, create the VM while applying vNUMA and multi-SCSI controller best practices.
From the main PE dashboard, open the VM view.
Click the + Create VM button.
Enter the compute settings. This setup matters for vNUMA performance because it exposes the underlying physical NUMA topology (2 CPUs with 8 cores each) to the guest OS of the VM.
Name: NEWSQL_VM
vCPUs: 12
Number of Sockets: 2
Cores per vCPU: 6 (This produces a 2-socket, 6-core VM, for a total of 12 vCPUs)
Memory: 128 GB
Scroll down to the Disks section and add the OS disk:
Click + Add New Disk.
Storage Container: Select the default (hybrid) container.
Size: 100 GB
Bus: SCSI
Device Index: 0 (This becomes scsi.0)
Click Add.
Add the Data disk (on its own controller for parallel processing):
Click + Add New Disk.
Storage Container: Select NEWSQL_Flash_Container.
Size: 750 GB
Bus: SCSI
Device Index: 1 (This creates a new controller, scsi.1)
Click Add.
Add a Log disk (on its own controller, which is a recommended practice for 'write-intensive' SQL):
Click + Add New Disk.
Storage Container: Select NEWSQL_Flash_Container.
Size: 100 GB (A typical size for a log disk)
Bus: SCSI
Device Index: 2 (This creates a third controller, scsi.2)
Click Add.
Check the configuration: three disks should now be attached, each on a separate controller (scsi.0, scsi.1, scsi.2). This arrangement provides the highest I/O performance.
Make sure the Power on VM after creation box is cleared.
Click Save.
Question 7 Domain 1 Monitoring & Troubleshooting
SIMULATION
The Database team has noticed slower performance for a business-critical application during Saturday workloads.
They want a monitoring report covering processor, memory, and storage usage for the cluster that supports the application: SQL01, SQL02.
The report must include the following views:
Cluster level, restricted to Cluster 1 only: the highest percentage of CPU consumed
VM level, covering any current or future VM whose name begins with SQL: the longest time taken, and the highest percentage of time a VM spends waiting for access to the physical CPU, relative to total CPU
The report must execute every Sunday at 12:00 AM and cover the previous 7 days. It should display a notification when it finishes.
Build a report named SQL_Batch_Saturday that satisfies these conditions.
Produce an instance of the SQL_Batch_Saturday report in CSV format and save the file.
Note: The report must be named SQL_Batch_Saturday to earn credit; any other name will be rejected. SMTP is not configured.
Here is the step-by-step procedure to build and run the report, carried out entirely within Prism Central.
1. Create the Analysis Session
First, we will create the charts and entities for the report using the Analysis tool.
From the Prism Central main menu, go to Operations > Analysis.
Click the + New Session button.
Add the required entities:
In the 'Entities' search box, type Cluster 1 and select Cluster: Cluster 1.
In the 'Entities' search box, type SQL01 and select VM: SQL01.
In the 'Entities' search box, type SQL02 and select VM: SQL02.
Click Add Charts > New Chart to create the Cluster CPU chart:
Title: Cluster 1 Max CPU Usage
Entity Type: Cluster
Metric: Cluster CPU Usage %
Aggregation: Select Maximum.
Click Add.
Click Add Charts > New Chart to create the VM CPU Ready Time chart:
Title: VM Max CPU Ready Time
Entity Type: VM
Metric: CPU Ready Time %
Aggregation: Select Maximum.
Click Add.
2. Save and Configure the Report
Next, save the session as a report and set it to dynamically include every VM with the SQL prefix.
Click the Save as Report icon (the bookmark icon in the upper right).
Name the report SQL_Batch_Saturday and click Save.
Go to Operations > Reports.
Locate the SQL_Batch_Saturday report you just created and click its name to open the report editor.
In the Entities tile, click the Edit (pencil) icon.
By default, it lists 'Cluster 1', 'SQL01', and 'SQL02'.
Adjust the VM selection:
Select the radio button for All VMs prefixed with.
In the text box, enter SQL.
Confirm that 'Cluster 1' is still listed under 'Clusters'.
Click Save.
3. Schedule the Report
While still in the report editor for SQL_Batch_Saturday, click the Schedule button.
Set up the schedule:
Recurrence: Weekly
Repeat on: Sunday
Start Time: 12:00 AM
Time Range: Previous 7 Days
Configure the notification (since SMTP is not available):
Expand the Notification Settings section.
Check the box for Notify when ready (this turns on the bell icon notification).
Make sure 'Email Report' is unchecked.
Click Save.
4. Generate and Save the CSV Instance
Finally, run the report immediately and download the CSV as requested.
Return to the main Operations > Reports list.
Tick the checkbox next to SQL_Batch_Saturday.
Click the Actions dropdown and select Run Now.
In the dialog, verify the time range (for example, 'Last 7 Days') and click Run.
Click the Report Instances tab.
Wait for the report instance 'SQL_Batch_Saturday' to finish (the status will change from 'Running' to Succeeded).
Once it has succeeded, click the Download (arrow) icon for that instance.
Select the CSV format.
Save the file to the desktop.
Question 8 Domain 3 Security
SIMULATION
Task 14
The application team has asked for several mission-critical VMs to be set up for disaster recovery. Once it is added, the remote site will not be managed by Prism Central, so this solution must be implemented through the Web Console.
Disaster Recovery requirements for each VM:
Mkt01
RPO: 2 hours
Retention: 5 snapshots
Fin01
RPO: 15 minutes
Retention: 7 days
Dev01
RPO: 1 day
Retention: 2 snapshots
Set up a DR solution that satisfies the listed requirements.
Every object created during this item must begin with the name of the VM it protects.
Note: the remote site will be added at a later time
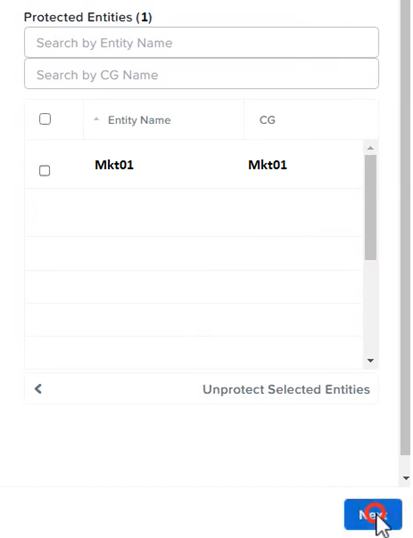
To set up a DR solution that meets the listed requirements, you can follow these steps:
Sign in to the Web Console of the source cluster where the VMs are running.
Select Protection Domains from the left menu, then click Create Protection Domain.
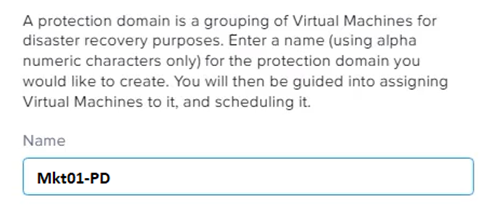
Type a name for the protection domain, such as PD_Mkt01, and add a description if needed. Click Next.
Choose Mkt01 from the VM list and click Next.
Pick Schedule Based from the drop-down menu and enter 2 hours as the interval. Click Next.
Pick Remote Site from the drop-down menu and select the remote site where you want the VM replicated. Click Next.
Enter 5 as the number of snapshots to keep on both the local and remote sites. Click Next.
Check the protection domain details and click Finish.
Follow the same steps for Fin01 and Dev01, using PD_Fin01 and PD_Dev01 as the protection domain names, and adjusting the interval and retention values to match the requirements.

What the Nutanix NCM-MCI Exam Covers
Exam domains verified against the Official Nutanix NCM-MCI exam guide, last checked November 2026.
Domain 1 Monitoring & Troubleshooting
Use prism analysis tools to identify performance issues; Perform health check and collect logs; Interpret alerts and take appropriate actions for remediation; Create reports and custom metrics to monitor the environment
Sample question from this domain above Q7
Domain 2 Optimize & Scale
Utilize runway scenarios to evaluate workload changes; Implement workload-based best practices; Utilize APIs to automate management tasks
Domain 3 Security
Perform advanced cluster configuration; Implement Flow Network Security; Configure advanced log management; Implement authentication according to best practices; Implement encryption, including KMS
Domain 4 Design Implementation
Configure Nutanix products and features to meet business needs; Configure networking to meet business needs; Align cluster configuration to requirements; Configure cluster policies and features for availability and resiliency; Create/Configure VMs based on workload requirements
Sample question from this domain above Q3
Domain 5 Business Continuity
Analyze Business Continuity and Disaster Recovery strategies and align them with organizational missions. Ensure BCDR strategies meet regulatory needs and satisfy particular organizational requirements.
NCM-MCI Exam FAQ
Common questions about the exam itself
What is the difference between NCM-MCI and the lower-level NCP-MCI certification?
Why is NCM-MCI considered harder than other Nutanix certifications?
How long should I spend preparing for NCM-MCI?
What happens on NCM-MCI exam day?
Which objective area gives candidates the most trouble?
How long does the NCM-MCI certification remain valid?
What job roles typically pursue NCM-MCI certification?
Can I retake the NCM-MCI exam if I fail?
What prerequisites do I need before taking NCM-MCI?
How does NCM-MCI fit into the Nutanix certification path?
Other Nutanix Exams
Free practice questions for more Nutanix certification exams