At ValidExamDumps, we consistently monitor updates to the Oracle 1Z0-1054-24 exam questions by Oracle. Whenever our team identifies changes in the exam questions,exam objectives, exam focus areas or in exam requirements, We immediately update our exam questions for both PDF and online practice exams. This commitment ensures our customers always have access to the most current and accurate questions. By preparing with these actual questions, our customers can successfully pass the Oracle Financials Cloud: General Ledger 2024 Implementation Professional exam on their first attempt without needing additional materials or study guides.
Other certification materials providers often include outdated or removed questions by Oracle in their Oracle 1Z0-1054-24 exam. These outdated questions lead to customers failing their Oracle Financials Cloud: General Ledger 2024 Implementation Professional exam. In contrast, we ensure our questions bank includes only precise and up-to-date questions, guaranteeing their presence in your actual exam. Our main priority is your success in the Oracle 1Z0-1054-24 exam, not profiting from selling obsolete exam questions in PDF or Online Practice Test.
Which two allow access to the BI Catalog for creating an Oracle Transactional Business Intelligence analysis? (Choose two.)
SIMULATION
Task 3
Manage Chart of Accounts Mappings
Scenario
Your client needs to consolidate their UK Ledger to the Canadian parent ledger. Each Chart of Accounts
has the following segments:
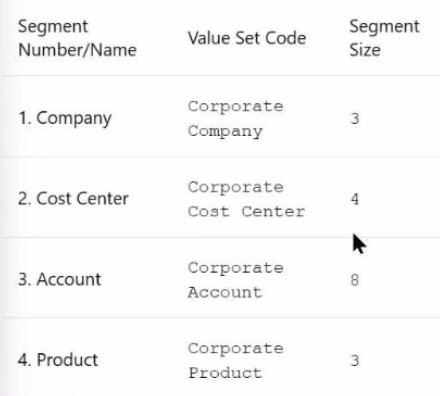
Company-LoB-Account-Cost Center-Product-Intercompany
Know that the Company, LoB, Product, and Intercompany segments share the same value sets.
Create a Chart of Accounts mappings to map UK Chart of Accounts to CA Chart of Accounts that meets the following specifications:
Cost Center Mapping
. Balance Sheet (0 and 000) should be mapped to
Balance Sheet
. All other cost centers should be mapped to 610
Account Mapping
. Asset accounts (in the 1000 range) should be
mapped to account 11101
. Liability accounts (in the 2000 range) should be
mapped to account 22100
. Equity accounts (in the 3000 range) should be
mapped to account 34000
. Revenue accounts (in the 4000 range) should be
mapped to account 42000
. Expense accounts (from 5000 onwards) should be
mapped to account 51100
Note:
* Do not use conditions based on parents.
. Treat any account after the 5000 range as an expense.
* Ensure all maps are numeric only.
* When creating your mapping rules for each segment
please allow for existing and future segment values
Here are the steps you need to follow:
In the Setup and Maintenance work area, go to the following:
Offering: Financials
Functional Area: Financial Reporting Structures
Task: Manage Chart of Accounts Mapping
Select the source chart of accounts (UK) and the target chart of accounts (CA) that you want to map.
Click on the Segment Rules tab to define the segment mapping rules. Enter the following information for each segment:
Segment Number: 1
Segment Name: Company
Mapping Type: Value
Source Value: *
Target Value: *
Segment Number: 2
Segment Name: LoB
Mapping Type: Value
Source Value: *
Target Value: *
Segment Number: 3
Segment Name: Account
Mapping Type: Range
Source From Value: 1000
Source To Value: 1999
Target Value: 11101
Mapping Type: Range
Source From Value: 2000
Source To Value: 2999
Target Value: 22100
Mapping Type: Range
Source From Value: 3000
Source To Value: 3999
Target Value: 34000
Mapping Type: Range
Source From Value: 4000
Source To Value: 4999
Target Value: 42000
Mapping Type: Range
Source From Value: 5000
Source To Value: 99999999
Target Value: 51100
Segment Number: 4
Segment Name: Cost Center
Mapping Type: Value
Source Value: 0
Target Value: Balance Sheet
Mapping Type: Value
Source Value: 000
Target Value: Balance Sheet
Mapping Type: Value
Source Value: *
Target Value: 610
Segment Number: 5
Segment Name: Product
Mapping Type: Value
Source Value: *
Target Value: *
Segment Number: 6
Segment Name: Intercompany
Mapping Type: Value
Source Value: *
Target Value: *
Click on the Save and Close button to save the segment mapping rules.
You have successfully created a Chart of Accounts mapping for the given scenario. For more information, you can refer to the following resources:
Overview of the Chart of Accounts Mapping Page
Chart of Accounts Structures and Instances
How To Create A Chart Of Accounts Mapping For A Secondary Ledger
How To Bulk Upload The Mapping Rules In ''Manage Chart of Accounts Mapping''
Centralized Management of Chart of Accounts Configurations
SIMULATION
Challenge 2
Manage Shorthand Aliases
Scenario
Your client intends to utilize the Shorthand Alias feature and would like to see how the aliases will appear when entering transactions.
Task 2
Create a shorthand alias for the US Chart of Accounts to record Revenue Domestic for Supremo Fitness, Line of Business 2, and US Operations Cost Center.
Note:
. Prefix your alias name with 07, where 07 is
your exam ID.
. There is no Product or Intercompany
impact.
Here are the steps you need to follow:
In the Setup and Maintenance work area, go to the following:
Offering: Financials
Functional Area: Financial Reporting Structures
Task: Manage Shorthand Aliases
Select the chart of accounts that you want to create the alias for. In this case, it is the Corporate chart of accounts.
Click on the Add Row icon to create a new alias. Enter the following information:
Alias Name: RevDom
Account Template: 101-2000-400000-000-000-000
Description: Revenue Domestic for Supremo Fitness, Line of Business 2, and US Operations Cost Center
Enabled: Yes
Start Date: Today's date
End Date: Blank
Click on the Save and Close button to save the alias.
You have successfully created a shorthand alias for the US Chart of Accounts. For more information, you can refer to the following resources:
Short Hand Alias in Fusion Financials Key Flexfield
How to Enable Account Shorthand Aliases
You entered users who are both employees and contingent workers. You want an automated way to assign, reassign, and remove roles from users. What feature do you use?
Which three factors should you consider while specifying Intercompany System options?
Intercompany System options are used to set up intercompany processing rules at the enterprise level, based on your specific business needs. They help you standardize and simplify transaction processing, minimize disputes, and reduce administrative costs. The three factors that you should consider while specifying Intercompany System options are:
Automatic or manual batch numbering and the minimum transaction amount: These options help you control the numbering and the size of intercompany transactions. You can choose to use system generated or manual batch numbering, and you can specify a minimum threshold amount for intercompany transactions to prevent immaterial transactions. To use the minimum transaction amount option, you must also select an Intercompany currency option.
Whether to enforce an enterprise-wide currency or allow intercompany transactions in local currencies: This option helps you manage the currency risk and the conversion rate fluctuations for intercompany transactions. You can choose to standardize transaction processing by selecting an Intercompany currency, which means that all intercompany transactions created in the Intercompany module are entered in this currency. Alternatively, you can choose to allow intercompany transactions in local currencies, which means that intercompany transactions can be entered in the ledger currency of the sender or the receiver.
Whether to allow receivers to reject intercompany transactions: This option helps you handle the approval and dispute resolution process for intercompany transactions. You can choose to allow receivers to reject intercompany transactions if they disagree with the sender's information, such as the amount, the account, or the date. If you enable this option, you must also specify the rejection reason and the notification details for the sender.