At ValidExamDumps, we consistently monitor updates to the Nutanix NCM-MCI-6.5 exam questions by Nutanix. Whenever our team identifies changes in the exam questions,exam objectives, exam focus areas or in exam requirements, We immediately update our exam questions for both PDF and online practice exams. This commitment ensures our customers always have access to the most current and accurate questions. By preparing with these actual questions, our customers can successfully pass the Nutanix Certified Master - Multicloud Infrastructure (NCM-MCI) v6.5 exam on their first attempt without needing additional materials or study guides.
Other certification materials providers often include outdated or removed questions by Nutanix in their Nutanix NCM-MCI-6.5 exam. These outdated questions lead to customers failing their Nutanix Certified Master - Multicloud Infrastructure (NCM-MCI) v6.5 exam. In contrast, we ensure our questions bank includes only precise and up-to-date questions, guaranteeing their presence in your actual exam. Our main priority is your success in the Nutanix NCM-MCI-6.5 exam, not profiting from selling obsolete exam questions in PDF or Online Practice Test.
Task 10
An administrator is working to create a VM using Nutanix V3 API calls with the following specifications.
* VM specifications:
* vCPUs: 2
* Memory: BGb
* Disk Size: 50Gb
* Cluster: Cluster A
* Network: default- net
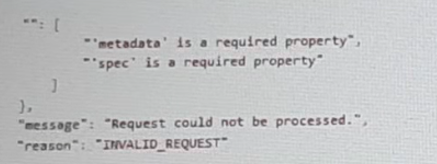
The API call is falling, indicating an issue with the payload:
The body is saved in Desktop/ Files/API_Create_VM,text
Correct any issues in the text file that would prevent from creating the VM. Also ensure the VM will be created as speeded and make sure it is saved for re-use using that filename.
Deploy the vm through the API
Note: Do not power on the VM.
https://portal.nutanix.com/page/documents/kbs/details?targetId=kA00e000000LLEzCAO
https://jsonformatter.curiousconcept.com/#
acli net.list (uuid network defult_net)
ncli cluster info (uuid cluster)
Put Call: https://Prism Central IP address : 9440/api/nutanix/v3vms
Edit these lines to fix the API call, do not add new lines or copy lines.
You can test using the Prism Element API explorer or PostMan
Body:
{
{
'spec': {
'name': 'Test_Deploy',
'resources': {
'power_state':'OFF',
'num_vcpus_per_socket': ,
'num_sockets': 1,
'memory_size_mib': 8192,
'disk_list': [
{
'disk_size_mib': 51200,
'device_properties': {
'device_type':'DISK'
}
},
{
'device_properties': {
'device_type':'CDROM'
}
}
],
'nic_list':[
{
'nic_type': 'NORMAL_NIC',
'is_connected': true,
'ip_endpoint_list': [
{
'ip_type': 'DHCP'
}
],
'subnet_reference': {
'kind': 'subnet',
'name': 'default_net',
'uuid': '00000000-0000-0000-0000-000000000000'
}
}
],
},
'cluster_reference': {
'kind': 'cluster',
'name': 'NTNXDemo',
'uuid': '00000000-0000-0000-0000-000000000000'
}
},
'api_version': '3.1.0',
'metadata': {
'kind': 'vm'
}
}
https://www.nutanix.dev/2019/08/26/post-a-package-building-your-first-nutanix-rest-api-post-request/
Reference
Task 14
The application team has requested several mission-critical VMs to be configured for disaster recovery. The remote site (when added) will not be managed by Prism Central. As such, this solution should be built using the Web Console.
Disaster Recovery requirements per VM:
Mkt01
RPO: 2 hours
Retention: 5 snapshots
Fin01
RPO: 15 minutes
Retention: 7 days
Dev01
RPO: 1 day
Retention: 2 snapshots
Configure a DR solution that meets the stated requirements.
Any objects created in this item must start with the name of the VM being protected.
Note: the remote site will be added later
To configure a DR solution that meets the stated requirements, you can follow these steps:
Log in to the Web Console of the source cluster where the VMs are running.
Click on Protection Domains on the left menu and click on Create Protection Domain.
Enter a name for the protection domain, such as PD_Mkt01, and a description if required. Click Next.
Select Mkt01 from the list of VMs and click Next.
Select Schedule Based from the drop-down menu and enter 2 hours as the interval. Click Next.
Select Remote Site from the drop-down menu and choose the remote site where you want to replicate the VM. Click Next.
Enter 5 as the number of snapshots to retain on both local and remote sites. Click Next.
Review the protection domain details and click Finish.
Repeat the same steps for Fin01 and Dev01, using PD_Fin01 and PD_Dev01 as the protection domain names, and adjusting the interval and retention values according to the requirements.


Task 1
An administrator has been asked to configure a storage for a distributed application which uses large data sets across multiple worker VMs.
The worker VMs must run on every node. Data resilience is provided at the application level and low cost per GB is a Key Requirement.
Configure the storage on the cluster to meet these requirements. Any new object created should include the phrase Distributed_App in the name.
To configure the storage on the cluster for the distributed application, you can follow these steps:
Log in to Prism Element of cluster A using the credentials provided.
Go to Storage > Storage Pools and click on Create Storage Pool.
Enter a name for the new storage pool, such as Distributed_App_Storage_Pool, and select the disks to include in the pool. You can choose any combination of SSDs and HDDs, but for low cost per GB, you may prefer to use more HDDs than SSDs.
Click Save to create the storage pool.
Go to Storage > Containers and click on Create Container.
Enter a name for the new container, such as Distributed_App_Container, and select the storage pool that you just created, Distributed_App_Storage_Pool, as the source.
Under Advanced Settings, enable Erasure Coding and Compression to reduce the storage footprint of the dat
a. You can also disable Replication Factor since data resilience is provided at the application level. These settings will help you achieve low cost per GB for the container.
Click Save to create the container.
Go to Storage > Datastores and click on Create Datastore.
Enter a name for the new datastore, such as Distributed_App_Datastore, and select NFS as the datastore type. Select the container that you just created, Distributed_App_Container, as the source.
Click Save to create the datastore.
The datastore will be automatically mounted on all nodes in the cluster. You can verify this by going to Storage > Datastores and clicking on Distributed_App_Datastore. You should see all nodes listed under Hosts.
You can now create or migrate your worker VMs to this datastore and run them on any node in the cluster. The datastore will provide low cost per GB and high performance for your distributed application.
====
Topic 1, Performance Based Questions
Environment
You have been provisioned a dedicated environment for your assessment which includes the following:
Workstation
* windows Server 2019
* All software/tools/etc to perform the required tasks
* Nutanix Documentation and whitepapers can be found in desktop\files\Documentation
* Note that the workstation is the system you are currently togged into
Nutanix Cluster
* There are three clusters provided. The connection information for the relevant cluster will be displayed to the high of the question Please make sure you are working on the correct cluster for each item Please ignore any licensing violations
* Cluster A is a 3-node cluster with Prism Central 2022.6 where most questions will be performed
* Cluster B is a one-node cluster and has one syslog item and one security item to perform
* Cluster D is a one-node duster with Prism Central 5.17 and has a security policy item to perform
Important Notes
* If the text is too small and hard to read, or you cannot see an of the GUI. you can increase/decrease the zoom of the browser with CTRL + ,and CTRL + (the plus and minus keys)
You will be given 3 hours to complete the scenarios for Nutanix NCMMCI
Once you click the start button below, you will be provided with:
- A Windows desktop A browser page with the scenarios and credentials (Desktop\instructions)
Notes for this exam delivery:
The browser can be scaled lo Improve visibility and fit all the content on the screen.
- Copy and paste hot-keys will not work Use your mouse for copy and paste.
- The Notes and Feedback tabs for each scenario are to leave notes for yourself or feedback for
- Make sure you are performing tasks on the correct components.
- Changing security or network settings on the wrong component may result in a falling grade.
- Do not change credentials on an component unless you are instructed to.
- All necessary documentation is contained in the Desktop\Files\Documentation directory
Task 11
An administrator has noticed that after a host failure, the SQL03 VM was not powered back on from another host within the cluster. The Other SQL VMs (SQL01, SQL02) have recovered properly in the past.
Resolve the issue and configure the environment to ensure any single host failure affects a minimal number os SQL VMs.
Note: Do not power on any VMs
One possible reason why the SQL03 VM was not powered back on after a host failure is that the cluster was configured with the default (best effort) VM high availability mode, which does not guarantee the availability of VMs in case of insufficient resources on the remaining hosts. To resolve this issue, I suggest changing the VM high availability mode to guarantee (reserved segments), which reserves some memory on each host for failover of VMs from a failed host. This way, the SQL03 VM will have a higher chance of being restarted on another host in case of a host failure.
To change the VM high availability mode to guarantee (reserved segments), you can follow these steps:
Log in to Prism Central and select the cluster where the SQL VMs are running.
Click on the gear icon on the top right corner and select Cluster Settings.
Under Cluster Services, click on Virtual Machine High Availability.
Select Guarantee (Reserved Segments) from the drop-down menu and click Save.
To configure the environment to ensure any single host failure affects a minimal number of SQL VMs, I suggest using anti-affinity rules, which prevent VMs that belong to the same group from running on the same host. This way, if one host fails, only one SQL VM will be affected and the other SQL VMs will continue running on different hosts.
To create an anti-affinity rule for the SQL VMs, you can follow these steps:
Log in to Prism Central and click on Entities on the left menu.
Select Virtual Machines from the drop-down menu and click on Create Group.
Enter a name for the group, such as SQL Group, and click Next.
Select the SQL VMs (SQL01, SQL02, SQL03) from the list and click Next.
Select Anti-Affinity from the drop-down menu and click Next.
Review the group details and click Finish.
I hope this helps. How else can I help?

Task 9
Part1
An administrator logs into Prism Element and sees an alert stating the following:
Cluster services down on Controller VM (35.197.75.196)
Correct this issue in the least disruptive manner.
Part2
In a separate request, the security team has noticed a newly created cluster is reporting.
CVM [35.197.75.196] is using the default password.
They have provided some new security requirements for cluster level security.
Security requirements:
Update the default password for the root user on the node to match the admin user password: Note: 192.168.x.x is not available. To access a node use the Host IP (172.30.0.x) from a CVM or the supplied external IP address.
Update the default password for the nutanix user on the CVM to match the admin user password.
Resolve the alert that is being reported.
Output the cluster-wide configuration of the SCMA policy to Desktop\Files\output.txt before changes are made.
Enable the Advance intrusion Detection Environment (AIDE) to run on a weekly basis for the cluster.
Enable high-strength password policies for the cluster.
Ensure CVMs require SSH keys for login instead of passwords. (SSH keys are located in the Desktop\Files\SSH folder).
Ensure the clusters meets these requirements. Do not reboot any cluster components.
To correct the issue of cluster services down on Controller VM (35.197.75.196) in the least disruptive manner, you need to do the following steps:
Log in to Prism Element using the admin user credentials.
Go to the Alerts page and click on the alert to see more details.
You will see which cluster services are down on the Controller VM. For example, it could be cassandra, curator, stargate, etc.
To start the cluster services, you need to SSH to the Controller VM using the nutanix user credentials. You can use any SSH client such as PuTTY or Windows PowerShell to connect to the Controller VM. You will need the IP address and the password of the nutanix user, which you can find in Desktop\Files\SSH\nutanix.txt.
Once you are logged in to the Controller VM, run the command:
cluster status | grep -v UP
This will show you which services are down on the Controller VM.
To start the cluster services, run the command:
cluster start
This will start all the cluster services on the Controller VM.
To verify that the cluster services are running, run the command:
cluster status | grep -v UP
This should show no output, indicating that all services are up.
To clear the alert, go back to Prism Element and click on Resolve in the Alerts page.
To meet the security requirements for cluster level security, you need to do the following steps:
To update the default password for the root user on the node to match the admin user password, you need to SSH to the node using the root user credentials. You can use any SSH client such as PuTTY or Windows PowerShell to connect to the node. You will need the IP address and the password of the root user, which you can find in Desktop\Files\SSH\root.txt.
Once you are logged in to the node, run the command:
passwd
This will prompt you to enter a new password for the root user. Enter the same password as the admin user, which you can find in Desktop\Files\SSH\admin.txt.
To update the default password for the nutanix user on the CVM to match the admin user password, you need to SSH to the CVM using the nutanix user credentials. You can use any SSH client such as PuTTY or Windows PowerShell to connect to the CVM. You will need the IP address and the password of the nutanix user, which you can find in Desktop\Files\SSH\nutanix.txt.
Once you are logged in to the CVM, run the command:
passwd
This will prompt you to enter a new password for the nutanix user. Enter the same password as the admin user, which you can find in Desktop\Files\SSH\admin.txt.
To resolve the alert that is being reported, go back to Prism Element and click on Resolve in the Alerts page.
To output the cluster-wide configuration of SCMA policy to Desktop\Files\output.txt before changes are made, you need to log in to Prism Element using the admin user credentials.
Go to Security > SCMA Policy and click on View Policy Details. This will show you the current settings of SCMA policy for each entity type.
Copy and paste these settings into a new text file named Desktop\Files\output.txt.
To enable AIDE (Advanced Intrusion Detection Environment) to run on a weekly basis for the cluster, you need to log in to Prism Element using the admin user credentials.
Go to Security > AIDE Configuration and click on Enable AIDE. This will enable AIDE to monitor file system changes on all CVMs and nodes in the cluster.
Select Weekly as the frequency of AIDE scans and click Save.
To enable high-strength password policies for the cluster, you need to log in to Prism Element using the admin user credentials.
Go to Security > Password Policy and click on Edit Policy. This will allow you to modify the password policy settings for each entity type.
For each entity type (Admin User, Console User, CVM User, and Host User), select High Strength as the password policy level and click Save.
To ensure CVMs require SSH keys for login instead of passwords, you need to log in to Prism Element using the admin user credentials.
Go to Security > Cluster Lockdown and click on Configure Lockdown. This will allow you to manage SSH access settings for the cluster.
Uncheck Enable Remote Login with Password. This will disable password-based SSH access to the cluster.
Click New Public Key and enter a name for the key and paste the public key value from Desktop\Files\SSH\id_rsa.pub. This will add a public key for key-based SSH access to the cluster.
Click Save and Apply Lockdown. This will apply the changes and ensure CVMs require SSH keys for login instead of passwords.
Part1
Enter CVM ssh and execute:
cluster status | grep -v UP
cluster start
If there are issues starting some services, check the following:
Check if the node is in maintenance mode by running the ncli host ls command on the CVM. Verify if the parameter Under Maintenance Mode is set to False for the node where the services are down. If the parameter Under Maintenance Mode is set to True, remove the node from maintenance mode by running the following command:
nutanix@cvm$ ncli host edit id=<host id> enable-maintenance-mode=false
You can determine the host ID by using ncli host ls.
Check for any latest FATALs for the service that is down. The following command prints all the FATALs for a CVM. Run this command on all CVMs.
nutanix@cvm$ for i in `svmips`; do echo 'CVM: $i'; ssh $i 'ls -ltr /home/nutanix/data/logs/*.FATAL'; done
NCC Health Check: cluster_services_down_check (nutanix.com)
Part2
Update the default password for the root user on the node to match the admin user password
echo -e 'CHANGING ALL AHV HOST ROOT PASSWORDS.\nPlease input new password: '; read -rs password1; echo 'Confirm new password: '; read -rs password2; if [ '$password1' == '$password2' ]; then for host in $(hostips); do echo Host $host; echo $password1 | ssh root@$host 'passwd --stdin root'; done; else echo 'The passwords do not match'; fi
Update the default password for the nutanix user on the CVM
sudo passwd nutanix
Output the cluster-wide configuration of the SCMA policy
ncli cluster get-hypervisor-security-config
Output Example:
nutanix@NTNX-372a19a3-A-CVM:10.35.150.184:~$ ncli cluster get-hypervisor-security-config
Enable Aide : false
Enable Core : false
Enable High Strength P... : false
Enable Banner : false
Schedule : DAILY
Enable iTLB Multihit M... : false
Enable the Advance intrusion Detection Environment (AIDE) to run on a weekly basis for the cluster.
ncli cluster edit-hypervisor-security-params enable-aide=true
ncli cluster edit-hypervisor-security-params schedule=weekly
Enable high-strength password policies for the cluster.
ncli cluster edit-hypervisor-security-params enable-high-strength-password=true
Ensure CVMs require SSH keys for login instead of passwords
https://portal.nutanix.com/page/documents/kbs/details?targetId=kA0600000008gb3CAA


