Key details for this exam, checked against the published exam outline
Each question shows the correct answer and an explanation of why it is right
SIMULATION
Documentation
Deployment, Pod Security Admission, Pod Security Standards
You must connect to the correct host . Failure to do so may result in a zero score.
[candidate@base] $ ssh cks000036
Context
For compliance, all user namespaces enforce the restricted Pod Security Standard .
Task
The confidential namespace contains a Deployment that is not compliant with the restricted Pod Security Standard . Thus, its Pods can not be scheduled.
Modify the Deployment to be compliant and verify that the Pods are running.
The Deployment's manifest file can be found at /home/candidate/nginx-unprivileged.yaml.
1) Connect to the correct host
ssh cks000036
sudo -i
export KUBECONFIG=/etc/kubernetes/admin.conf
2) Confirm the failing Pods + see the PSA error (fast)
kubectl -n confidential get deploy
kubectl -n confidential get pods
kubectl -n confidential describe deploy <deployment-name> | sed -n '/Events/,$p'
(You'll usually see ''violates PodSecurity 'restricted' ...'' with the exact missing fields.)
3) Edit the provided manifest
vi /home/candidate/nginx-unprivileged.yaml
You must ensure the Pod template becomes compliant. Add/ensure the following exact blocks:
4) Add Pod-level securityContext (under spec.template.spec)
Find:
spec:
template:
spec:
Add this block under it (or merge if securityContext: already exists):
securityContext:
runAsNonRoot: true
runAsUser: 65535
seccompProfile:
type: RuntimeDefault
5) Add Container-level securityContext (under the nginx container)
Find:
containers:
- name: ...
image: ...
Under that container, add (or adjust) this exact block:
securityContext:
allowPrivilegeEscalation: false
readOnlyRootFilesystem: true
capabilities:
drop:
- ALL
If there are multiple containers, apply the same container securityContext to each one.
Save and exit:
:wq
6) Apply the manifest to the confidential namespace
kubectl -n confidential apply -f /home/candidate/nginx-unprivileged.yaml
Wait rollout:
kubectl -n confidential rollout status deployment/<deployment-name>
If you don't know the deployment name from the file, list:
kubectl -n confidential get deploy
7) Verify Pods are running
kubectl -n confidential get pods -o wide
If still failing, show the exact PSA violation (this tells you what else to fix):
kubectl -n confidential describe pod
Quick ''if it still fails'' fixes (common restricted blockers)
Open the manifest again and ensure these are NOT set (or are removed/false):
hostNetwork: true
hostPID: true
hostIPC: true
any hostPort:
privileged: true
capabilities.add:
seccompProfile: Unconfined
runAsUser: 0 or runAsNonRoot: false
Then re-apply.
Minimal compliant result (what the grader expects)
Your Pod template should include:
seccompProfile: RuntimeDefault
runAsNonRoot: true (and a non-root UID like 65535)
container: allowPrivilegeEscalation: false
container: capabilities.drop: [ALL]
container: readOnlyRootFilesystem: true
SIMULATION
Enable audit logs in the cluster, To Do so, enable the log backend, and ensure that
1. logs are stored at /var/log/kubernetes/kubernetes-logs.txt.
2. Log files are retained for 5 days.
3. at maximum, a number of 10 old audit logs files are retained.
Edit and extend the basic policy to log:
1. Cronjobs changes at RequestResponse
2. Log the request body of deployments changes in the namespace kube-system.
3. Log all other resources in core and extensions at the Request level.
4. Don't log watch requests by the "system:kube-proxy" on endpoints or
SIMULATION
Context
You must fully integrate a container image scanner into the kubeadm provisioned cluster.
Task
Given an incomplete configuration located at /etc/kubernetes/bouncer and a functional container image scanner
with an HTTPS endpoint at https://smooth-yak.local/review, perform the following tasks to implement a validating admission controller.
First, re-configure the API server to enable all admission plugin(s) to support the provided AdmissionConfiguration.
Next, re-configure the ImagePolicyWebhook configuration to deny images on backend failure.
Next, complete the backend configuration to point to the container image scanner's endpoint at https://smooth-yak.local/review.
Finally, to test the configuration, deploy the test resource defined in /home/candidate/vulnerable.yaml which is using an image that should be denied.
You may delete and re-create the resource as often as needed.
The container image scanner's log file is located at /var/log/nginx/access_log.
Below is the CKS exam style ''do-this-exactly'' runbook for Q3. It includes the minimal discovery commands (so you don't guess filenames), then the exact lines/blocks to set.
QUESTION 3 -- ImagePolicyWebhook (Validating Admission) -- Exam Steps
0) SSH + root
ssh cks000002
sudo -i
1) Identify the provided config files (no guessing)
ls -la /etc/kubernetes/bouncer
You are looking for files typically named like:
admission_configuration.yaml (AdmissionConfiguration)
imagepolicywebhook.yaml (ImagePolicyWebhookConfiguration) OR the ImagePolicyWebhook config embedded inside the AdmissionConfiguration
kubeconfig (webhook kubeconfig)
If unsure which is which, quick peek:
grep -R 'ImagePolicyWebhook' -n /etc/kubernetes/bouncer
grep -R 'AdmissionConfiguration' -n /etc/kubernetes/bouncer
grep -R 'kubeconfig' -n /etc/kubernetes/bouncer
PART A --- Reconfigure API Server to enable required admission plugin(s)
2) Edit API server static pod manifest
vi /etc/kubernetes/manifests/kube-apiserver.yaml
2.1 Enable the admission plugin ImagePolicyWebhook
Find the line starting with:
- --enable-admission-plugins=
Ensure ImagePolicyWebhook is included in that comma list.
Example (your list may differ; just add ImagePolicyWebhook):
- --enable-admission-plugins=NodeRestriction,ImagePolicyWebhook
If the flag does not exist, add one line under command::
- --enable-admission-plugins=ImagePolicyWebhook
2.2 Point API server to the provided AdmissionConfiguration
In the same file, ensure this flag exists (use the file in /etc/kubernetes/bouncer that contains AdmissionConfiguration):
- --admission-control-config-file=/etc/kubernetes/bouncer/admission_configuration.yaml
If your file is named differently, use the real filename you found in step 1, but keep the flag name exactly --admission-control-config-file.
Save/exit:
:wq
Static pod will restart automatically (kubelet watches the manifest).
Optional quick watch:
docker ps | grep kube-apiserver
# or:
crictl ps | grep kube-apiserver
PART B --- Configure ImagePolicyWebhook to deny images on backend failure
3) Edit the ImagePolicyWebhook config
One of these is true on your cluster:
Option 1 (most common in these tasks): ImagePolicyWebhook config is a standalone file
Edit the file in /etc/kubernetes/bouncer that contains kind: ImagePolicyWebhookConfiguration:
grep -R 'kind: ImagePolicyWebhookConfiguration' -n /etc/kubernetes/bouncer
vi /etc/kubernetes/bouncer/<THE_FILE_YOU_FOUND>.yaml
Set (or ensure) exactly:
defaultAllow: false
Option 2: ImagePolicyWebhook config is embedded inside AdmissionConfiguration
Edit the AdmissionConfiguration file:
vi /etc/kubernetes/bouncer/admission_configuration.yaml
Find the plugin section for ImagePolicyWebhook and ensure the config includes:
defaultAllow: false
Save/exit:
:wq
PART C --- Point backend configuration to https://smooth-yak.local/review
4) Edit the webhook kubeconfig to use the scanner endpoint
Find the kubeconfig file referenced by the ImagePolicyWebhook config.
Search for kubeConfigFile:
grep -R 'kubeConfigFile' -n /etc/kubernetes/bouncer
Open that kubeconfig path (example name below; yours may differ):
vi /etc/kubernetes/bouncer/kubeconfig
In kubeconfig, set the cluster server exactly:
clusters:
- cluster:
server: https://smooth-yak.local/review
Save/exit:
:wq
PART D --- Restart effect (make sure API server picks up config)
Because you already edited /etc/kubernetes/manifests/kube-apiserver.yaml, the API server restarted.
To be safe (and fast), force a restart by ''touching'' the manifest (no content change needed):
touch /etc/kubernetes/manifests/kube-apiserver.yaml
PART E --- Test: apply vulnerable workload and confirm it is denied
5) Use admin kubeconfig (because old kubectl config may break)
export KUBECONFIG=/etc/kubernetes/admin.conf
kubectl get nodes
6) Deploy the test resource (should be DENIED)
kubectl apply -f /home/candidate/vulnerable.yaml
Expected: admission error/denied message.
If it already exists:
kubectl delete -f /home/candidate/vulnerable.yaml
kubectl apply -f /home/candidate/vulnerable.yaml
PART F --- Verify the scanner was called (log check)
7) Check scanner access log
tail -n 50 /var/log/nginx/access_log
You should see requests hitting /review.
Quick ''what to check if it doesn't deny''
Run these in order:
Confirm API server flags:
grep -n 'enable-admission-plugins' /etc/kubernetes/manifests/kube-apiserver.yaml
grep -n 'admission-control-config-file' /etc/kubernetes/manifests/kube-apiserver.yaml
Confirm deny-on-failure:
grep -R 'defaultAllow' -n /etc/kubernetes/bouncer
Must show:
defaultAllow: false
Confirm endpoint:
grep -R 'server: https://smooth-yak.local/review' -n /etc/kubernetes/bouncer
API server logs (docker runtime):
docker ps | grep kube-apiserver
docker logs $(docker ps -q --filter name=kube-apiserver) --tail 80
If you paste the output of:
ls - /etc/kubernetes/bouncer
grep -R 'kind: AdmissionConfiguration' -n /etc/kubernetes/bouncer
grep -R 'ImagePolicyWebhook' -n /etc/kubernetes/bouncer
SIMULATION
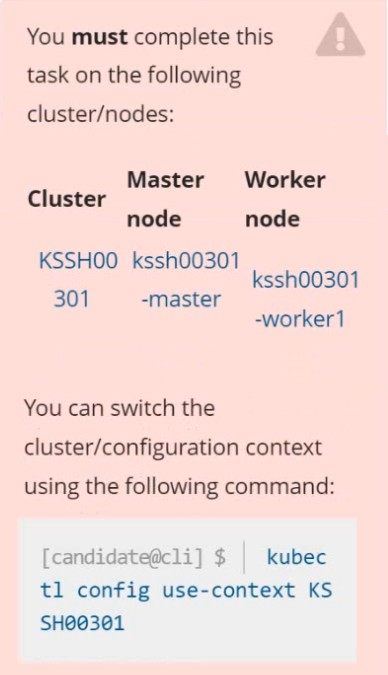
Task
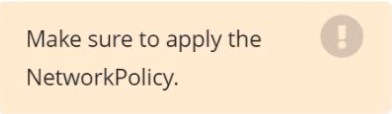
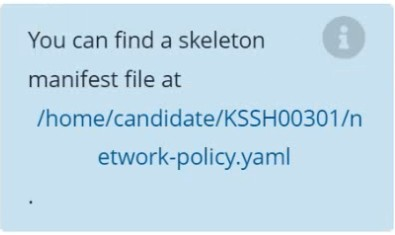
Create a NetworkPolicy named pod-access to restrict access to Pod users-service running in namespace dev-team.
Only allow the following Pods to connect to Pod users-service:
SIMULATION
Context
For testing purposes, the kubeadm provisioned cluster 's API server
was configured to allow unauthenticated and unauthorized access.
Task
First, secure the cluster 's API server configuring it as follows:
. Forbid anonymous authentication
. Use authorization mode Node,RBAC
. Use admission controller NodeRestriction
The cluster uses the Docker Engine as its container runtime . If needed, use the docker command to troubleshoot running containers.
kubectl is configured to use unauthenticated and unauthorized access. You do not have to change it, but be aware that kubectl will stop working once you have secured the cluster .
You can use the cluster 's original kubectl configuration file located at etc/kubernetes/admin.conf to access the secured cluster.
Next, to clean up, remove the ClusterRoleBinding
system:anonymous.
1) SSH to control-plane node
ssh cks000002
sudo -i
2) Edit API Server static pod manifest
API server in kubeadm runs as a static pod.
vi /etc/kubernetes/manifests/kube-apiserver.yaml
3) Apply required API Server security settings
3.1 Forbid anonymous authentication
Find command: section and ensure this line exists:
- --anonymous-auth=false
3.2 Use authorization mode Node,RBAC
Ensure exactly this line exists (and no AlwaysAllow):
- --authorization-mode=Node,RBAC
Remove if present:
- --authorization-mode=AlwaysAllow
3.3 Enable admission controller NodeRestriction
Find --enable-admission-plugins and ensure NodeRestriction is included.
Correct example:
- --enable-admission-plugins=NodeRestriction
If other plugins already exist, append NodeRestriction, e.g.:
- --enable-admission-plugins=NamespaceLifecycle,ServiceAccount,NodeRestriction
4) Save file and let kubelet restart API server
Just save and exit (:wq)
Kubelet will automatically restart the API server pod.
5) Switch kubectl to secured config
Current kubectl will stop working after API server hardening.
export KUBECONFIG=/etc/kubernetes/admin.conf
Verify access:
kubectl get nodes
6) Remove insecure ClusterRoleBinding
Delete system:anonymous binding:
kubectl delete clusterrolebinding system:anonymous
Verify removal:
kubectl get clusterrolebinding | grep anonymous
(no output = correct)
7) Quick validation (optional but fast)
API server flags check:
grep -n 'anonymous-auth' /etc/kubernetes/manifests/kube-apiserver.yaml
grep -n 'authorization-mode' /etc/kubernetes/manifests/kube-apiserver.yaml
grep -n 'NodeRestriction' /etc/kubernetes/manifests/kube-apiserver.yaml
SIMULATION
Create a RuntimeClass named gvisor-rc using the prepared runtime handler named runsc.
Create a Pods of image Nginx in the Namespace server to run on the gVisor runtime class
Install the Runtime Class for gVisor
{ # Step 1: Install a RuntimeClass
cat <<EOF | kubectl apply -f -
apiVersion: node.k8s.io/v1beta1
kind: RuntimeClass
metadata:
name: gvisor
handler: runsc
EOF
}
Create a Pod with the gVisor Runtime Class
{ # Step 2: Create a pod
cat <<EOF | kubectl apply -f -
apiVersion: v1
kind: Pod
metadata:
name: nginx-gvisor
spec:
runtimeClassName: gvisor
containers:
- name: nginx
image: nginx
EOF
}
Verify that the Pod is running
{ # Step 3: Get the pod
kubectl get pod nginx-gvisor -o wide
}
SIMULATION
Create a RuntimeClass named untrusted using the prepared runtime handler named runsc.
Create a Pods of image alpine:3.13.2 in the Namespace default to run on the gVisor runtime class.
Exam domains verified against: Official Linux Foundation CKS exam guide, last checked October 2026.
Use network security policies to restrict cluster level access. Review security configurations of Kubernetes components like etcd and kubelet against CIS benchmarks to identify and remediate misconfigurations.
Sample question from this domain above: Q4
Restrict access to the Kubernetes API through RBAC and minimize exposure of service accounts by disabling defaults and enforcing least privilege permissions. Keep Kubernetes updated to patch security vulnerabilities.
Sample question from this domain above: Q5
Reduce the attack surface of host operating systems by minimizing IAM roles and external network access. Apply kernel hardening tools like AppArmor and seccomp to enforce additional security boundaries.
Set up OS level security domains using Pod Security Policies and OPA to isolate workloads. Implement pod to pod encryption through mutual TLS and manage secrets securely.
Sample question from this domain above: Q1
Minimize base image footprint and establish registry whitelist policies. Sign and validate container images, scan for known vulnerabilities, and perform static analysis of Kubernetes manifests and Dockerfiles.
Sample question from this domain above: Q3
Perform behavioral analysis of syscalls and file activities at container and host level to detect threats. Use audit logs to monitor API access and maintain container immutability at runtime.
Sample question from this domain above: Q2
Common questions about the exam itself

