The Certified Kubernetes Application Developer (CKAD) exam, offered by the Linux Foundation, validates your ability to design, build, and deploy applications on Kubernetes. This certification is ideal for developers and engineers who work with containerized applications and need to demonstrate practical Kubernetes skills. This page guides you through the exam structure, core topics, and effective preparation strategies to help you succeed on test day.
Use this topic map to guide your study for Linux Foundation CKAD (Certified Kubernetes Application Developer) within the Kubernetes Application Developer path.
The CKAD exam combines multiple-choice questions and hands-on practical scenarios to assess both theoretical knowledge and real-world problem-solving ability. Questions progress in difficulty and reflect actual tasks you'll encounter when managing Kubernetes applications.
The exam emphasizes practical application over memorization, so expect questions that require you to think through design trade-offs and implementation details.
A structured study plan aligned to the five exam domains ensures you cover all critical areas efficiently. Dedicate time each week to one or two topics, practice hands-on labs, and review weak areas before taking a full-length mock exam.
Explore other Linux Foundation certifications: view all Linux Foundation exams.
Strengthen your preparation with up‑to‑date resources from validexamdumps.com. These materials align to CKAD and cover practical scenarios with clear explanations.
Visit the exam page to download the PDF, Online Practice Test, or get a Bundle Discount offer for both formats: Certified Kubernetes Application Developer.
Application Deployment and Services and Networking typically account for a significant portion of the exam. However, all five domains are equally important for real-world application development, so balanced preparation across all topics is essential for success.
In practice, these domains overlap constantly. You design and build an image (Application Design and Build), deploy it using a Deployment resource (Application Deployment), inject configuration via ConfigMaps and Secrets (Application Environment/Configuration/Security), expose it through a Service (Services and Networking), and monitor its health with logs and probes (Application Observability and Maintenance). Understanding these connections helps you approach problems holistically.
You should have at least 6-12 months of practical Kubernetes experience, including working with kubectl, creating manifests, and deploying applications. Prioritize labs that cover pod creation, service exposure, configuration management, and troubleshooting to build confidence in the exam environment.
Common errors include rushing through scenario questions without fully reading requirements, forgetting to set resource requests and limits, misconfiguring service selectors, and not verifying deployments after applying changes. Slow down on each question, double-check your manifests, and use kubectl to validate your work before moving on.
Review your practice test results and drill weak areas rather than re-reading all study materials. Take one full-length timed mock exam to simulate test conditions, practice rapid kubectl commands and manifest editing, and ensure you understand the reasoning behind each answer. Get adequate sleep and avoid cramming new topics the night before.
SIMULATION
Context
Developers occasionally need to submit pods that run periodically.
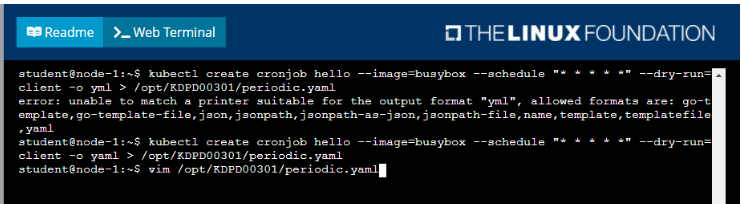
Task
Follow the steps below to create a pod that will start at a predetermined time and]which runs to completion only once each time it is started:
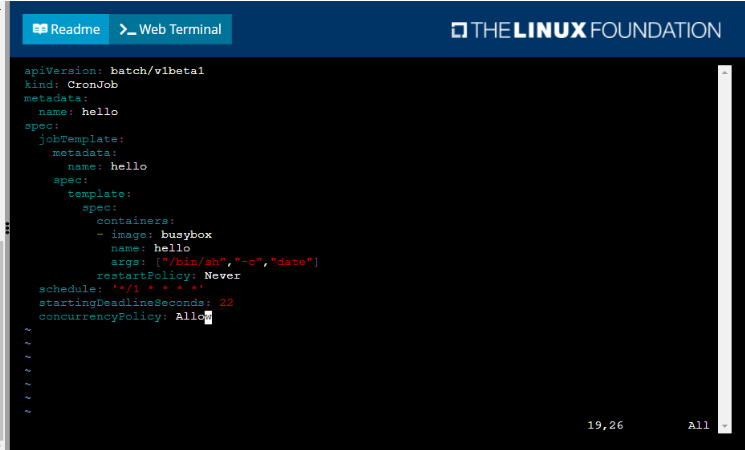
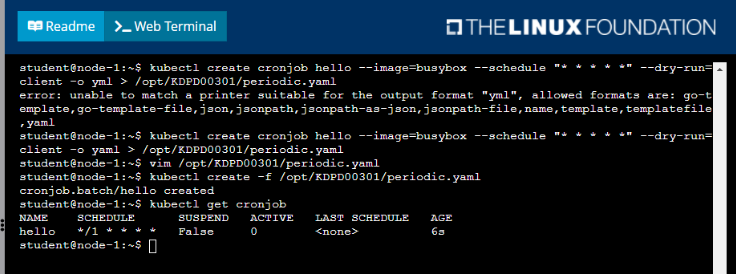
* Create a YAML formatted Kubernetes manifest /opt/KDPD00301/periodic.yaml that runs the following shell command: date in a single busybox container. The command should run every minute and must complete within 22 seconds or be terminated oy Kubernetes. The Cronjob namp and container name should both be hello
* Create the resource in the above manifest and verify that the job executes successfully at least once
Solution:
SIMULATION
Task:
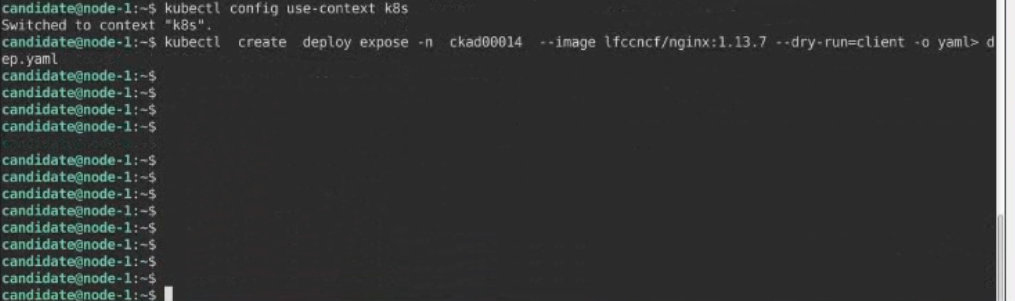
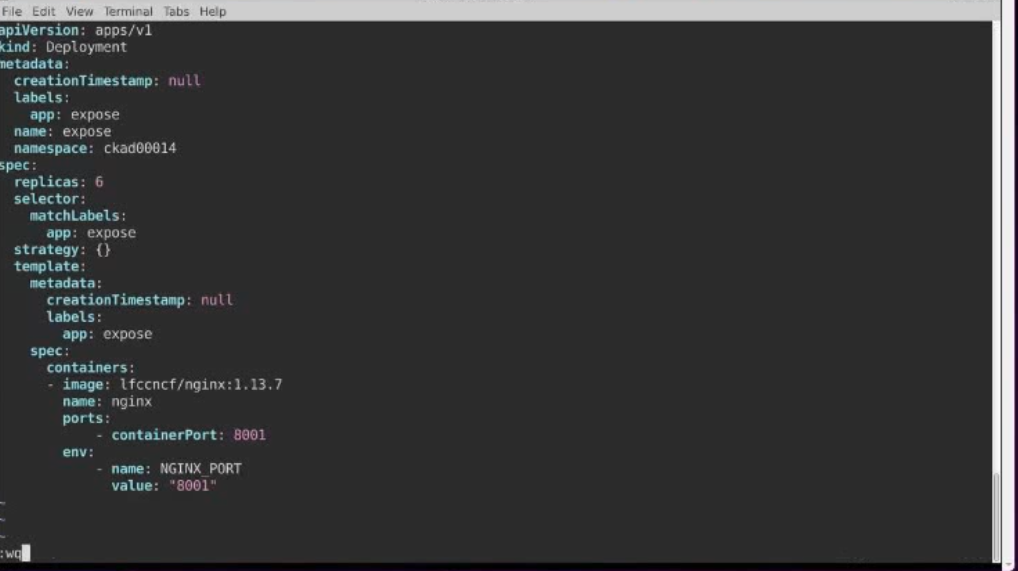
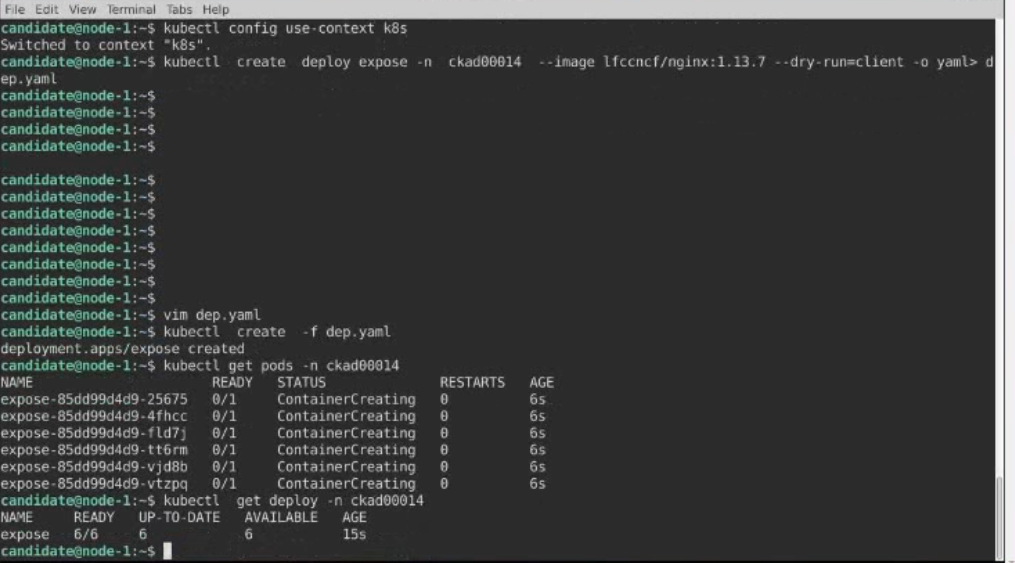
Create a Deployment named expose in the existing ckad00014 namespace running 6 replicas of a Pod. Specify a single container using the ifccncf/nginx: 1.13.7 image
Add an environment variable named NGINX_PORT with the value 8001 to the container then expose port 8001
Solution:
SIMULATION

Task:
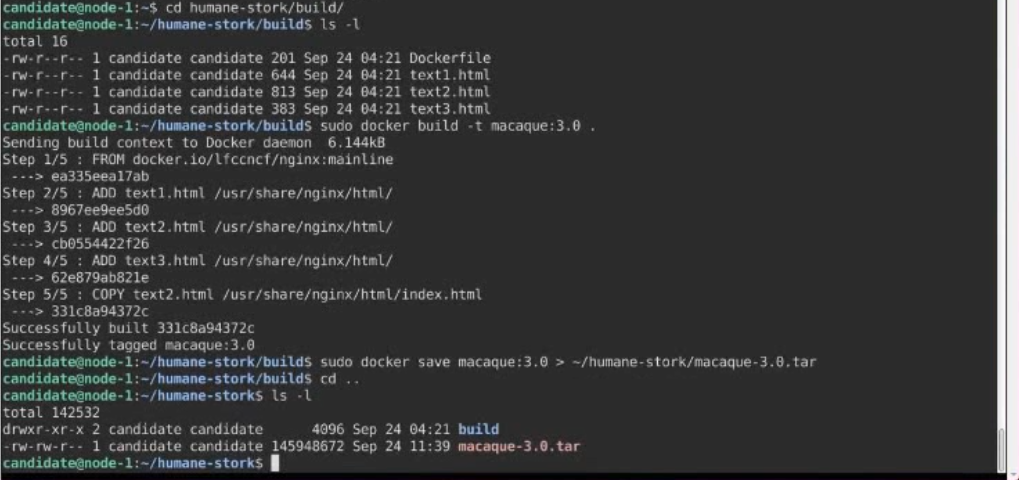
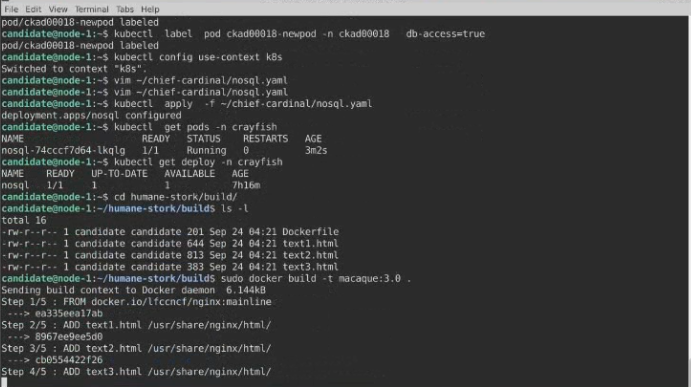
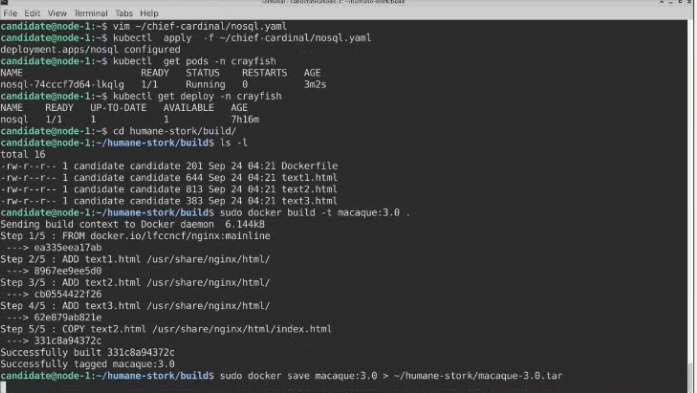
A Dockerfile has been prepared at -/human-stork/build/Dockerfile
1) Using the prepared Dockerfile, build a container image with the name macque and lag 3.0. You may install and use the tool of your choice.
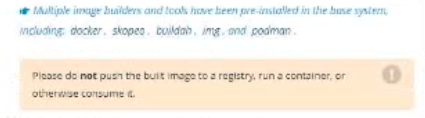
2) Using the tool of your choice export the built container image in OC-format and store it at -/human stork/macque 3.0 tar
Solution:
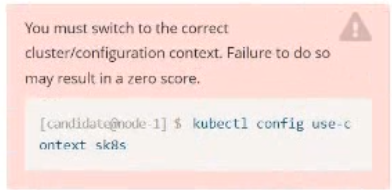
SIMULATION
Set Configuration Context:
[student@node-1] $ | kubectl
Config use-context k8s
Context
A container within the poller pod is hard-coded to connect the nginxsvc service on port 90 . As this port changes to 5050 an additional container needs to be added to the poller pod which adapts the container to connect to this new port. This should be realized as an ambassador container within the pod.
Task
* Update the nginxsvc service to serve on port 5050.
* Add an HAproxy container named haproxy bound to port 90 to the poller pod and deploy the enhanced pod. Use the image haproxy and inject the configuration located at /opt/KDMC00101/haproxy.cfg, with a ConfigMap named haproxy-config, mounted into the container so that haproxy.cfg is available at /usr/local/etc/haproxy/haproxy.cfg. Ensure that you update the args of the poller container to connect to localhost instead of nginxsvc so that the connection is correctly proxied to the new service endpoint. You must not modify the port of the endpoint in poller's args . The spec file used to create the initial poller pod is available in /opt/KDMC00101/poller.yaml
Solution:
To update the nginxsvc service to serve on port 5050, you will need to edit the service's definition yaml file. You can use the kubectl edit command to edit the service in place.
kubectl edit svc nginxsvc
This will open the service definition yaml file in your default editor. Change the targetPort of the service to 5050 and save the file.
To add an HAproxy container named haproxy bound to port 90 to the poller pod, you will need to edit the pod's definition yaml file located at /opt/KDMC00101/poller.yaml.
You can add a new container to the pod's definition yaml file, with the following configuration:
containers:
- name: haproxy
image: haproxy
ports:
- containerPort: 90
volumeMounts:
- name: haproxy-config
mountPath: /usr/local/etc/haproxy/haproxy.cfg
subPath: haproxy.cfg
args: ['haproxy', '-f', '/usr/local/etc/haproxy/haproxy.cfg']
This will add the HAproxy container to the pod and configure it to listen on port 90. It will also mount the ConfigMap haproxy-config to the container, so that haproxy.cfg is available at /usr/local/etc/haproxy/haproxy.cfg.
To inject the configuration located at /opt/KDMC00101/haproxy.cfg to the container, you will need to create a ConfigMap using the following command:
kubectl create configmap haproxy-config --from-file=/opt/KDMC00101/haproxy.cfg
You will also need to update the args of the poller container so that it connects to localhost instead of nginxsvc. You can do this by editing the pod's definition yaml file and changing the args field to args: ['poller','--host=localhost'].
Once you have made these changes, you can deploy the updated pod to the cluster by running the following command:
kubectl apply -f /opt/KDMC00101/poller.yaml
This will deploy the enhanced pod with the HAproxy container to the cluster. The HAproxy container will listen on port 90 and proxy connections to the nginxsvc service on port 5050. The poller container will connect to localhost instead of nginxsvc, so that the connection is correctly proxied to the new service endpoint.
Please note that, this is a basic example and you may need to tweak the haproxy.cfg file and the args based on your use case.
SIMULATION
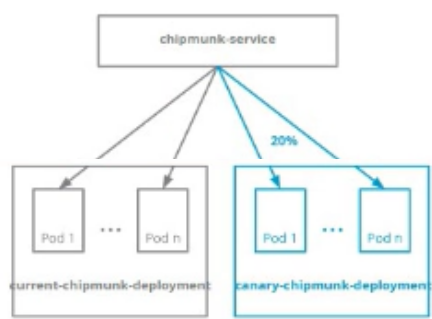
You are asked to prepare a canary deployment for testing a new application release.
You must connect to the correct host . Failure to do so may result in a zero score.
[candidate@base] $ ssh ckad00023
Modify the Deployments so that:
a maximum number of 10 Pods run in the moose namespace.
20% of the chipmunk-service 's traffic goes to the canary-chipmunk-deployment Pod
(s).
The Service is exposed on NodePort 30000. To test its load- balancing, run
[candidate@ckad00023] $ curl http://localhost:30000/
or open this URL in the remote desktop's browser.
ssh ckad00023
You need two outcomes in moose:
At most 10 Pods total (across both Deployments).
About 20% of chipmunk-service traffic goes to canary-chipmunk-deployment.
In Kubernetes Services, traffic distribution is (roughly) proportional to the number of ready endpoints behind the Service. So the standard canary trick is:
total endpoints = 10
canary endpoints = 2
current endpoints = 8
That gives ~20% to canary.
1) Inspect what exists
kubectl -n moose get deploy
kubectl -n moose get svc chipmunk-service -o wide
kubectl -n moose describe svc chipmunk-service
Get the Service selector (important):
kubectl -n moose get svc chipmunk-service -o jsonpath='{.spec.selector}{'\n'}'
Check current replicas:
kubectl -n moose get deploy current-chipmunk-deployment -o jsonpath='{.spec.replicas}{'\n'}'
kubectl -n moose get deploy canary-chipmunk-deployment -o jsonpath='{.spec.replicas}{'\n'}'
List pods + labels (to confirm both Deployments' pods match the Service selector):
kubectl -n moose get pods --show-labels
2) Ensure both Deployments are behind the Service
This is the key: the pods from BOTH deployments must match the Service selector.
If the Service selector is something like app=chipmunk, then both Deployments' pod templates must include app: chipmunk.
If one Deployment doesn't match, patch its pod template labels to match the selector.
2A) Example: selector is app=chipmunk
(Only do this if you see the Service selector contains app=chipmunk and one of the deployments is missing it.)
kubectl -n moose patch deploy current-chipmunk-deployment \
-p '{'spec':{'template':{'metadata':{'labels':{'app':'chipmunk'}}}}}'
kubectl -n moose patch deploy canary-chipmunk-deployment \
-p '{'spec':{'template':{'metadata':{'labels':{'app':'chipmunk'}}}}}'
Wait for rollouts if patches triggered new ReplicaSets:
kubectl -n moose rollout status deploy current-chipmunk-deployment
kubectl -n moose rollout status deploy canary-chipmunk-deployment
Verify endpoints now include pods from both deployments:
kubectl -n moose get endpoints chipmunk-service -o wide
3) Set replicas to enforce ''max 10 pods'' and ''20% canary''
Set:
current = 8
canary = 2
Total = 10.
kubectl -n moose scale deploy current-chipmunk-deployment --replicas=8
kubectl -n moose scale deploy canary-chipmunk-deployment --replicas=2
Wait until ready:
kubectl -n moose rollout status deploy current-chipmunk-deployment
kubectl -n moose rollout status deploy canary-chipmunk-deployment
Confirm total pods is 10 (or less) and all are Running/Ready:
kubectl -n moose get pods
kubectl -n moose get pods | tail -n +2 | wc -l
Confirm endpoints count matches 10:
kubectl -n moose get endpoints chipmunk-service -o jsonpath='{.subsets[*].addresses[*].ip}' | wc -w
4) Test load balancing via NodePort 30000
Run several times:
for i in $(seq 1 30); do curl -s http://localhost:30000/; echo; done
You should see canary responses appear roughly ~20% of the time (not exact every run).
If you want a clearer signal, check which pods are endpoints and ensure 2 belong to canary and 8 to current:
kubectl -n moose get pods -l app=chipmunk -o wide
kubectl -n moose get endpoints chipmunk-service -o wide