Key details for this exam, checked against the published exam outline
Each question shows the correct answer and an explanation of why it is right
SIMULATION
List all the pods showing name and namespace with a json path expression
kubectl get pods -o=jsonpath='{.items[*]['metadata.name',
'metadata.namespace']}'
SIMULATION
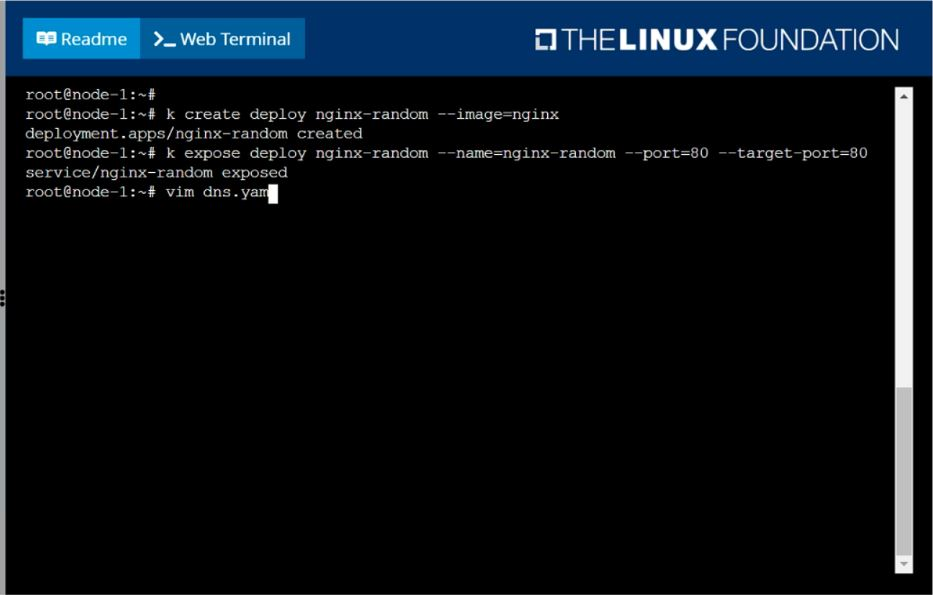
Create a deployment as follows:
Name: nginx-random
Exposed via a service nginx-random
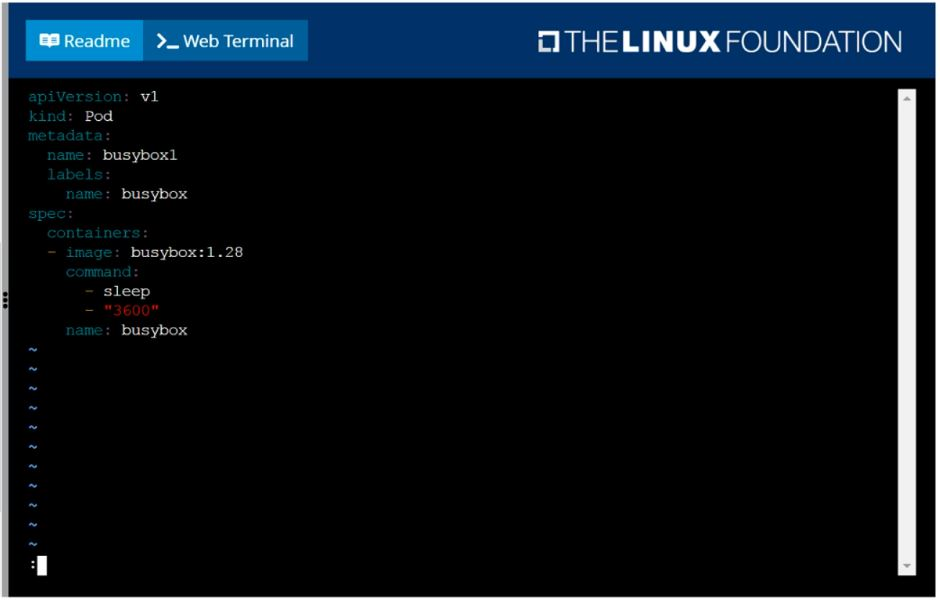
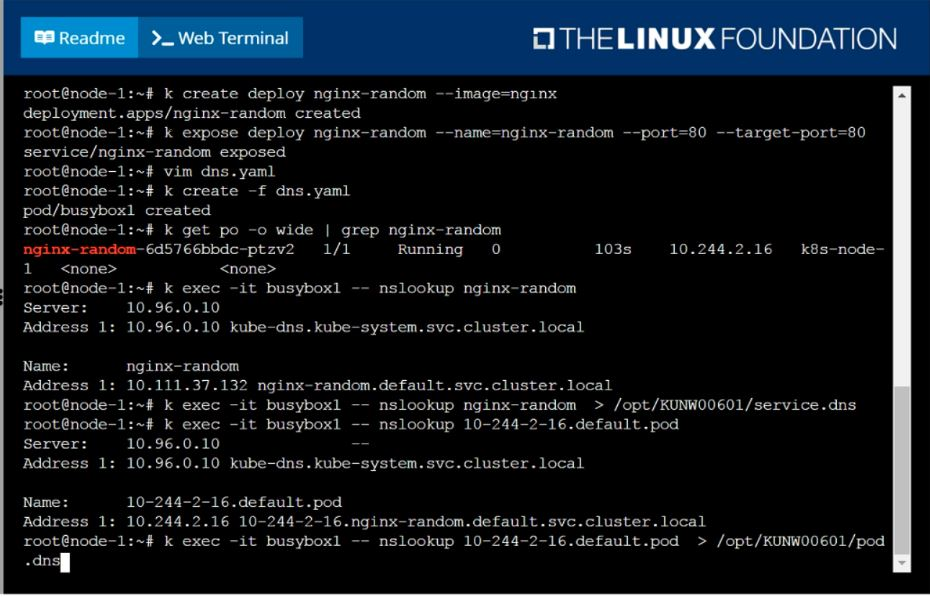
Ensure that the service and pod are accessible via their respective DNS records
The container(s) within any pod(s) running as a part of this deployment should use the nginx Image
Next, use the utility nslookup to look up the DNS records of the service and pod and write the output to /opt/KUNW00601/service.dns and /opt/KUNW00601/pod.dns respectively.
Solution:
SIMULATION
You must connect to the correct host.
Failure to do so may result in a zero score.
[candidate@base] $ ssh Cka000059
Context
A kubeadm provisioned cluster was migrated to a new machine. It needs configuration changes to
run successfully.
Task
Fix a single-node cluster that got broken during machine migration.
First, identify the broken cluster components and investigate what breaks them.
The decommissioned cluster used an external etcd server.
Next, fix the configuration of all broken cluster
Task Summary
SSH into node: cka000059
Cluster was migrated to a new machine
It uses an external etcd server
Identify and fix misconfigured components
Bring the cluster back to a healthy state
Step-by-Step Solution
Step 1: SSH into the correct host
ssh cka000059
Step 2: Check the cluster status
Run:
kubectl get nodes
If it fails, the kubelet or kube-apiserver is likely broken.
Check kubelet status:
sudo systemctl status kubelet
Also, check pod statuses in the control plane:
sudo crictl ps -a | grep kube
or:
docker ps -a | grep kube
Look especially for failures in kube-apiserver or kube-controller-manager.
Step 3: Inspect the kube-apiserver manifest
Since this is a kubeadm-based cluster, manifests are in:
ls /etc/kubernetes/manifests
Open kube-apiserver.yaml:
bash
CopyEdit
sudo nano /etc/kubernetes/manifests/kube-apiserver.yaml
Look for the --etcd-servers= flag. If the external etcd endpoint has changed (likely, due to migration), this needs to be fixed.
Example of incorrect configuration:
--etcd-servers=https://192.168.1.100:2379
If the IP has changed, update it to the correct IP or hostname of the external etcd server.
Also ensure the correct client certificate and key paths are still valid:
--etcd-cafile=/etc/kubernetes/pki/etcd/ca.crt
--etcd-certfile=/etc/kubernetes/pki/apiserver-etcd-client.crt
--etcd-keyfile=/etc/kubernetes/pki/apiserver-etcd-client.key
If the files are missing or the path is wrong due to migration, correct those as well.
Step 4: Save and exit, and let static pod restart
Static pod changes will be picked up automatically by the kubelet (watch for /etc/kubernetes/manifests changes).
Check again:
docker ps | grep kube-apiserver
# or
crictl ps | grep kube-apiserver
Step 5: Confirm API is healthy
Once kube-apiserver is up, try:
kubectl get componentstatuses
kubectl get nodes
If these commands work and return valid statuses, the control plane is functional again.
Step 6: Check controller-manager and scheduler (optional)
If still broken, check the other static pods in /etc/kubernetes/manifests/ and correct paths if necessary.
Also verify that /etc/kubernetes/kubelet.conf and /etc/kubernetes/admin.conf are present and valid.
Command Summary
ssh cka000059
# Check system and kubelet
sudo systemctl status kubelet
docker ps -a | grep kube # or crictl ps -a | grep kube
# Check manifests
ls /etc/kubernetes/manifests
sudo nano /etc/kubernetes/manifests/kube-apiserver.yaml
# Fix --etcd-servers and certificate paths if needed
# Watch pods restart and confirm:
kubectl get nodes
kubectl get componentstatuses
SIMULATION
Perform the following tasks:
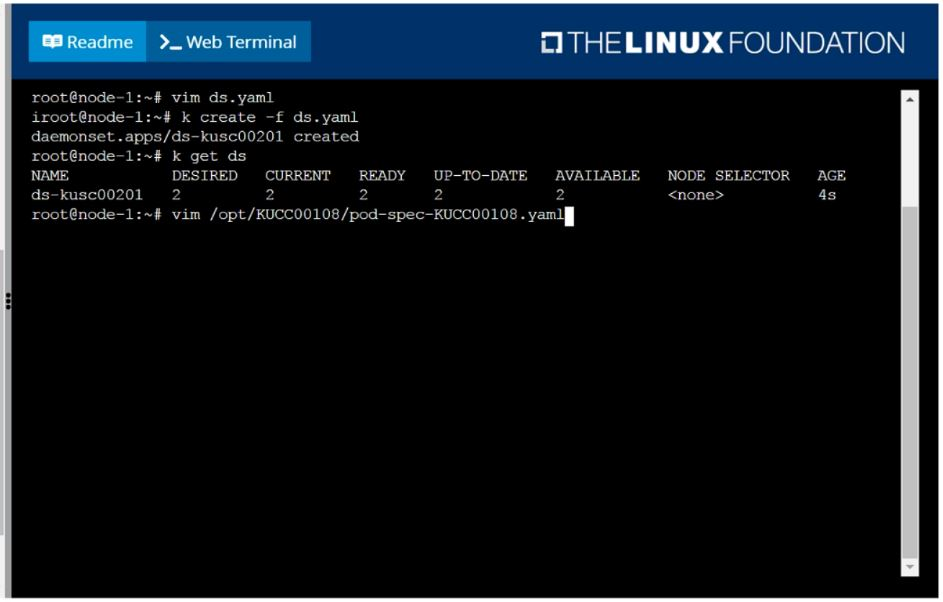
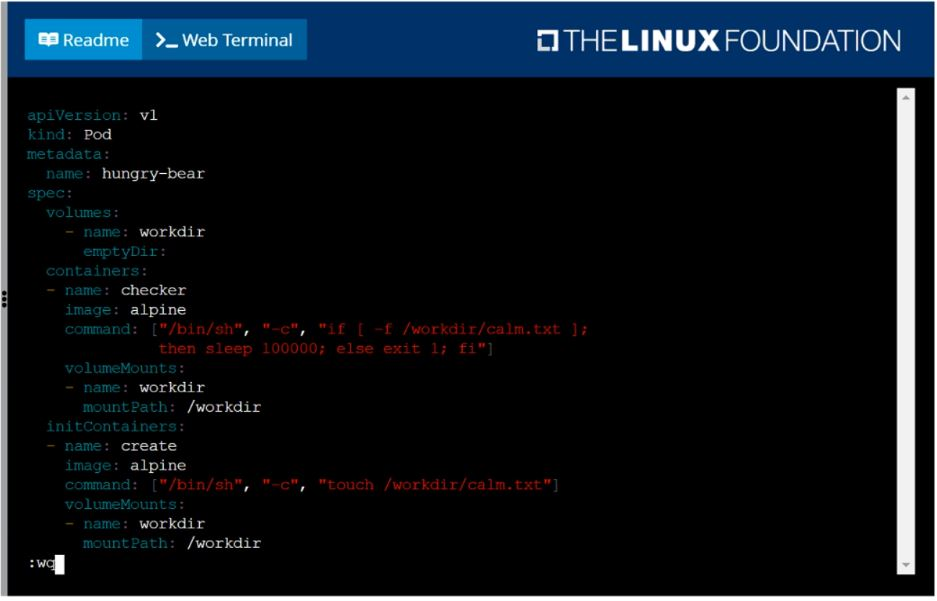
Add an init container to hungry-bear (which has been defined in spec file /opt/KUCC00108/pod-spec-KUCC00108.yaml)
The init container should create an empty file named/workdir/calm.txt
If /workdir/calm.txt is not detected, the pod should exit
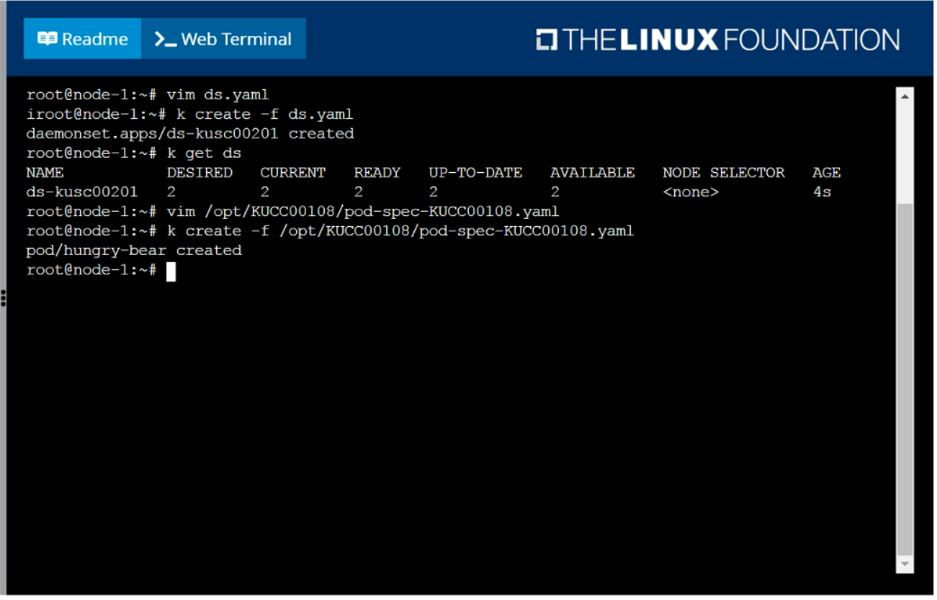
Once the spec file has been updated with the init container definition, the pod should be created
solution
SIMULATION
Quick Reference
ConfigMaps,
Documentation Deployments,
Namespace
You must connect to the correct host . Failure to do so may result in a zero score.
[candidate@base] $ ssh cka000048b
Task
An NGINX Deployment named nginx-static is running in the nginx-static namespace. It is configured using a ConfigMap named nginx-config .
First, update the nginx-config ConfigMap to also allow TLSv1.2. connections.
You may re-create, restart, or scale resources as necessary.
You can use the following command to test the changes:
[candidate@cka000048b] $ curl -- tls-max
1.2 https://web.k8s.local
Task Summary
SSH into cka000048b
Update the nginx-config ConfigMap in the nginx-static namespace to allow TLSv1.2
Ensure the nginx-static Deployment picks up the new config
Verify the change using the provided curl command
Step-by-Step Instructions
Step 1: SSH into the correct host
ssh cka000048b
Step 2: Get the ConfigMap
kubectl get configmap nginx-config -n nginx-static -o yaml > nginx-config.yaml
Open the file for editing:
nano nginx-config.yaml
Look for the TLS configuration in the data field. You are likely to find something like:
ssl_protocols TLSv1.3;
Modify it to include TLSv1.2 as well:
ssl_protocols TLSv1.2 TLSv1.3;
Save and exit the file.
Now update the ConfigMap:
kubectl apply -f nginx-config.yaml
Step 3: Restart the NGINX pods to pick up the new ConfigMap
Pods will not reload a ConfigMap automatically unless it's mounted in a way that supports dynamic reload and the app is watching for it (NGINX typically doesn't by default).
The safest way is to restart the pods:
Option 1: Roll the deployment
kubectl rollout restart deployment nginx-static -n nginx-static
Option 2: Delete pods to force recreation
kubectl delete pod -n nginx-static -l app=nginx-static
Step 4: Verify using curl
Use the provided curl command to confirm that TLS 1.2 is accepted:
curl --tls-max 1.2 https://web.k8s.local
A successful response means the TLS configuration is correct.
Final Command Summary
ssh cka000048b
kubectl get configmap nginx-config -n nginx-static -o yaml > nginx-config.yaml
nano nginx-config.yaml # Modify to include 'ssl_protocols TLSv1.2 TLSv1.3;'
kubectl apply -f nginx-config.yaml
kubectl rollout restart deployment nginx-static -n nginx-static
# or
kubectl delete pod -n nginx-static -l app=nginx-static
curl --tls-max 1.2 https://web.k8s.local
SIMULATION
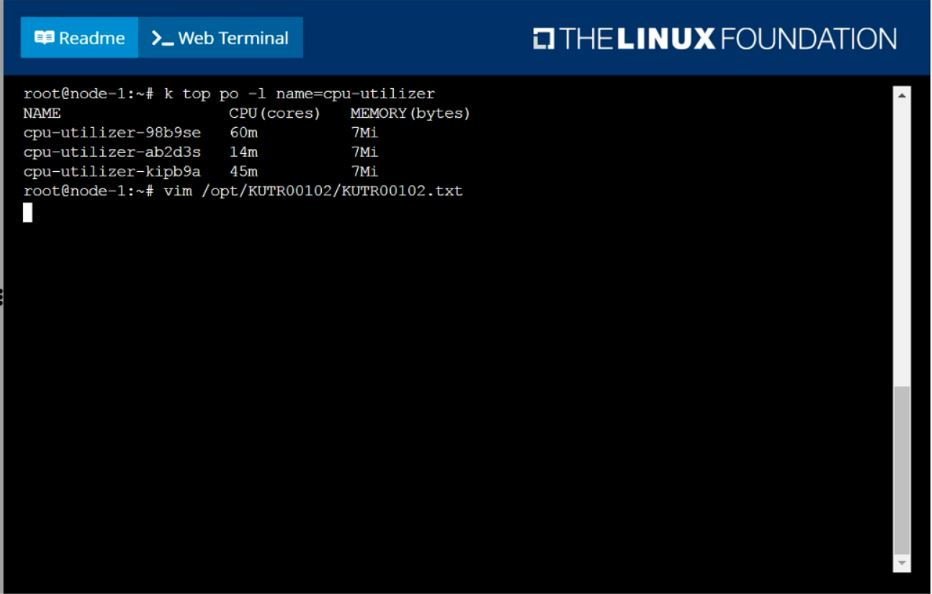
From the pod label name=cpu-utilizer, find pods running high CPU workloads and
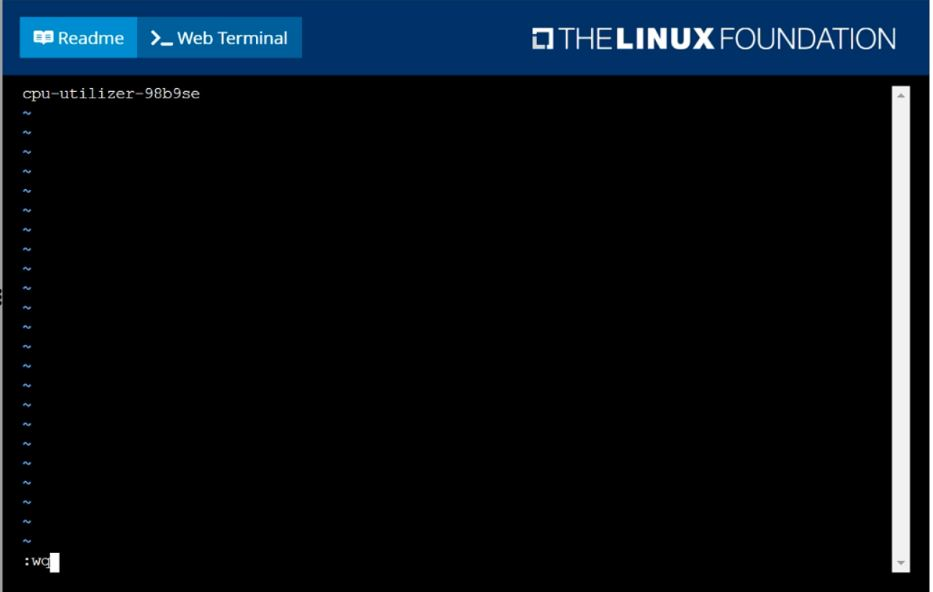
write the name of the pod consuming most CPU to the file /opt/KUTR00102/KUTR00102.txt (which already exists).
solution
Exam domains verified against: Official Linux Foundation CKA exam guide, last checked September 2026.
Understand storage classes and persistent volumes, including volume mode, access modes, and reclaim policies. Understand persistent volume claims and know how to configure applications with persistent storage.
Evaluate cluster and node logging and understand how to monitor applications. Manage container stdout and stderr logs, troubleshoot application failures, cluster component failures, and networking issues.
Sample question from this domain above: Q6
Understand deployments and perform rolling updates and rollbacks. Use ConfigMaps and Secrets to configure applications, scale applications, understand primitives for self-healing deployments, manage resource limits affecting pod scheduling, and be aware of manifest management and templating tools.
Manage role based access control (RBAC) and use Kubeadm to install basic clusters. Manage highly-available Kubernetes clusters, provision underlying infrastructure, perform version upgrades, and implement etcd backup and restore procedures.
Sample question from this domain above: Q3
Understand host networking configuration on cluster nodes and connectivity between pods. Work with ClusterIP, NodePort, and LoadBalancer service types, use Ingress controllers and resources, configure CoreDNS, and choose appropriate container network interface plugins.
Sample question from this domain above: Q2
Common questions about the exam itself

